In a company, it is important to generate reports to manage a business in a successful way. We have to manage different reports on different operations to analyze the performance of the company. Generating reports on accounting related operations and financial transactions is the key to the success of a business firm.
Analytic accounting is an application that can help the business to analyze accounting documents, interpret their results and generate reports. IT will also support reinvoicing and cost management.
Analytical accounting tool helps to do all analysis and report generation activities based on the chart of accounts of the company.
In this blog, we can take a glance at the key benefits of Analytic Accounting and how to use Odoo 14 Analytic Accounting.
Advantages of Analytical Accounting
– Department level cost analysis
– Profitability of a new line of product
– The cost of a new project
– Cost analysis based on time spent
– Helps you to avoid the creation of more accounts in the chart of accounts
– Can create an analytic account for different projects
How to configure analytic accounting?
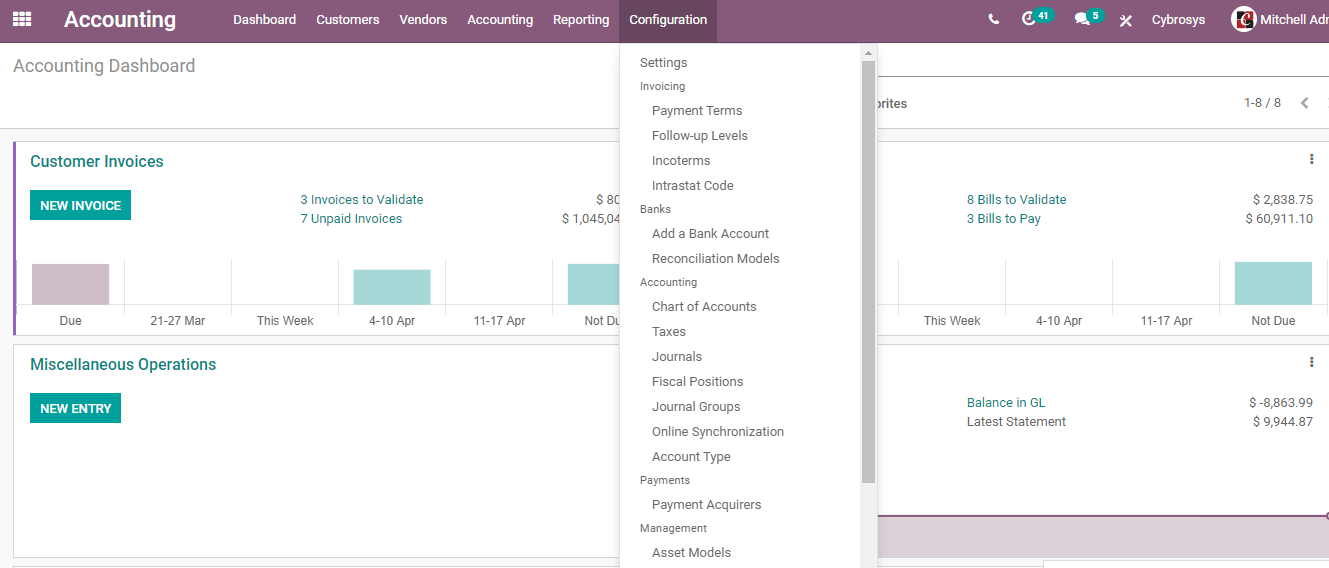
To do this, first, enter the dashboard of the accounting module and go to Configuration.
Here, we can click on Settings and go to the settings.
In the module settings page, we have to scroll down and go to Analytics
Here, we can find Analytic accounting and Analytic tags.
We can activate these two options.
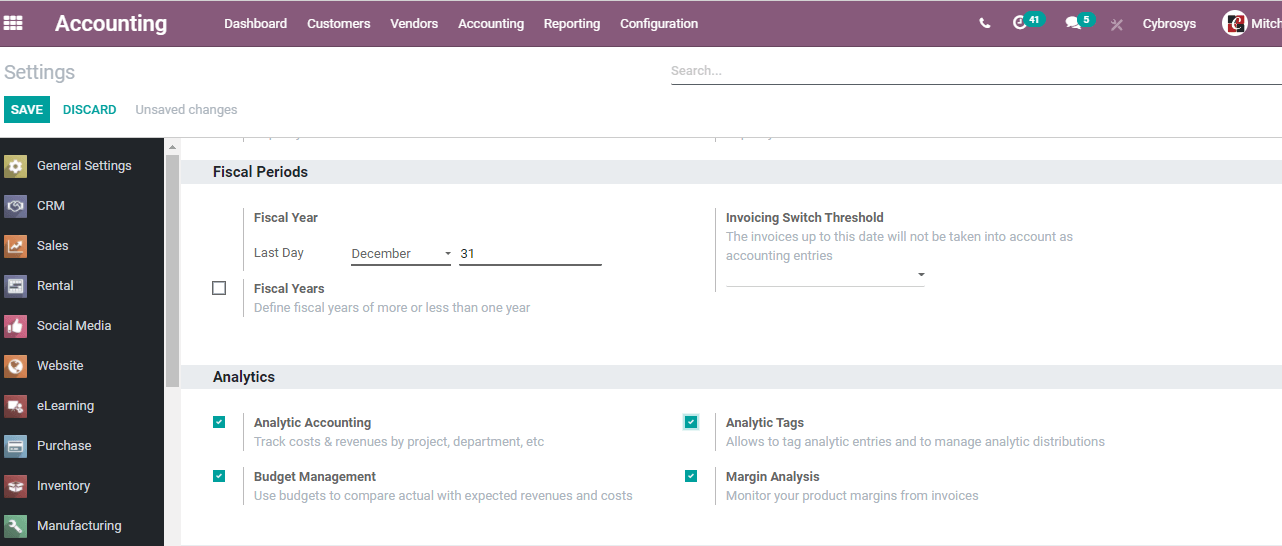
We have saved the changes before moving forward.
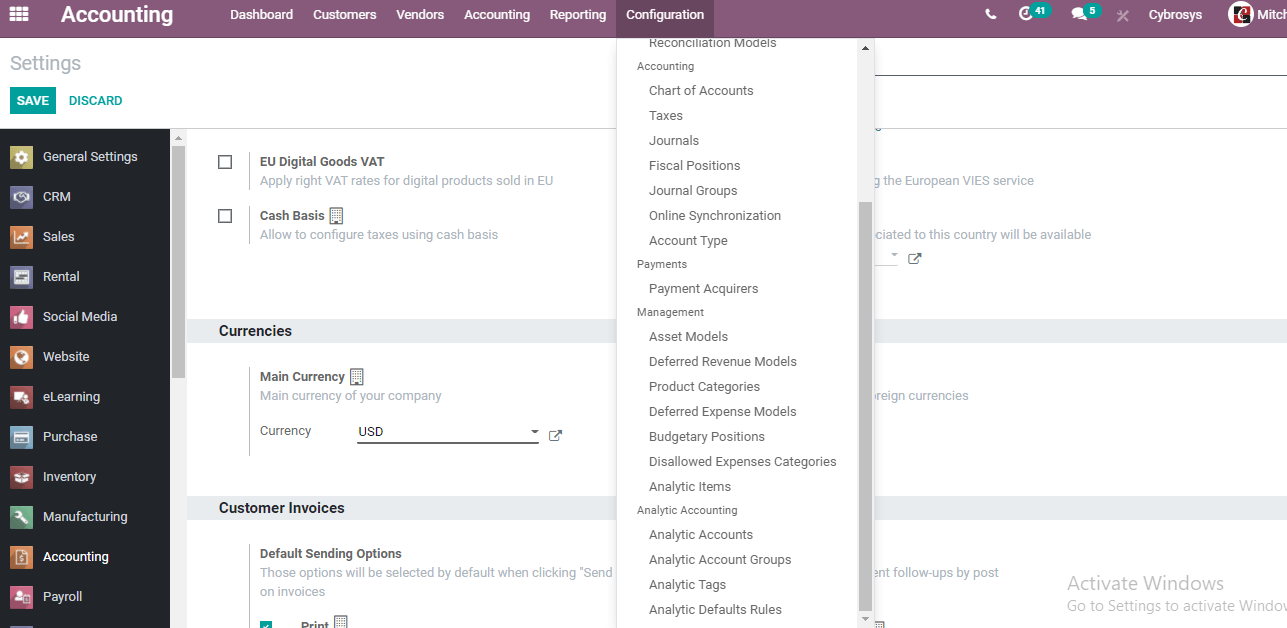
Now we have to go to the configuration again and choose the analytic account.
The below-given screenshot gives you a glimpse of the analytic account page.
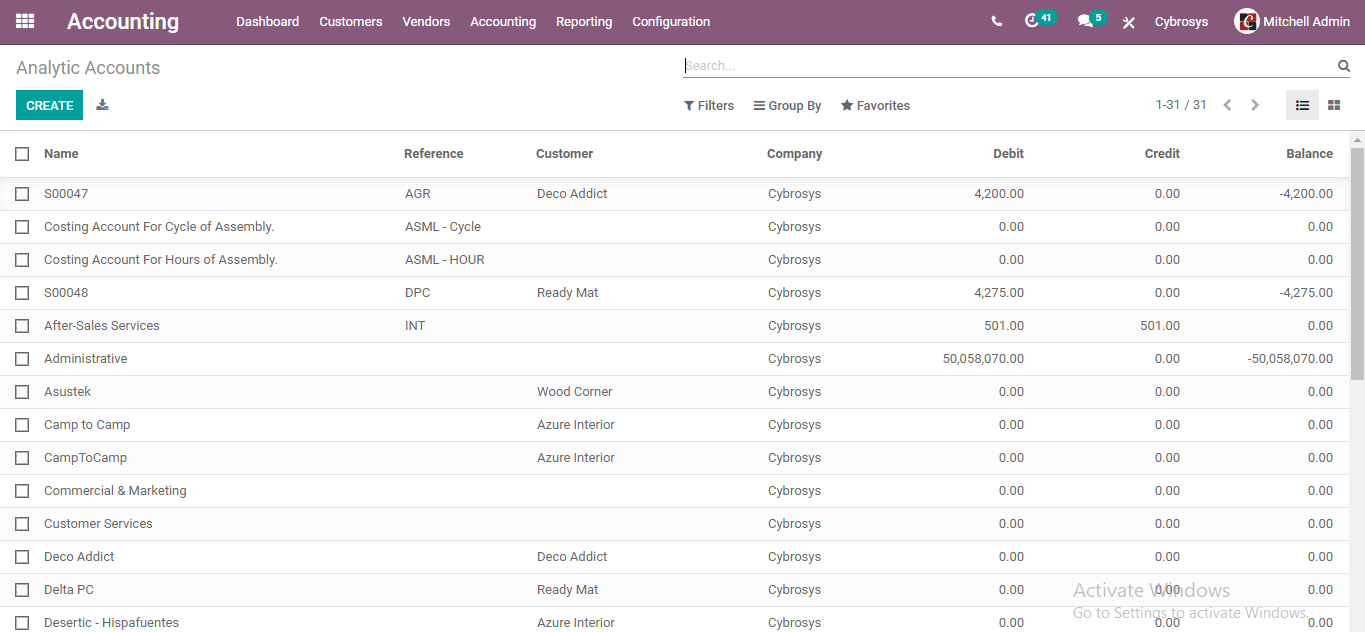
Set aside your worries about the existing accounts. It is simple and effortless to create a new analytic account.
Using the Create button gives us a new window
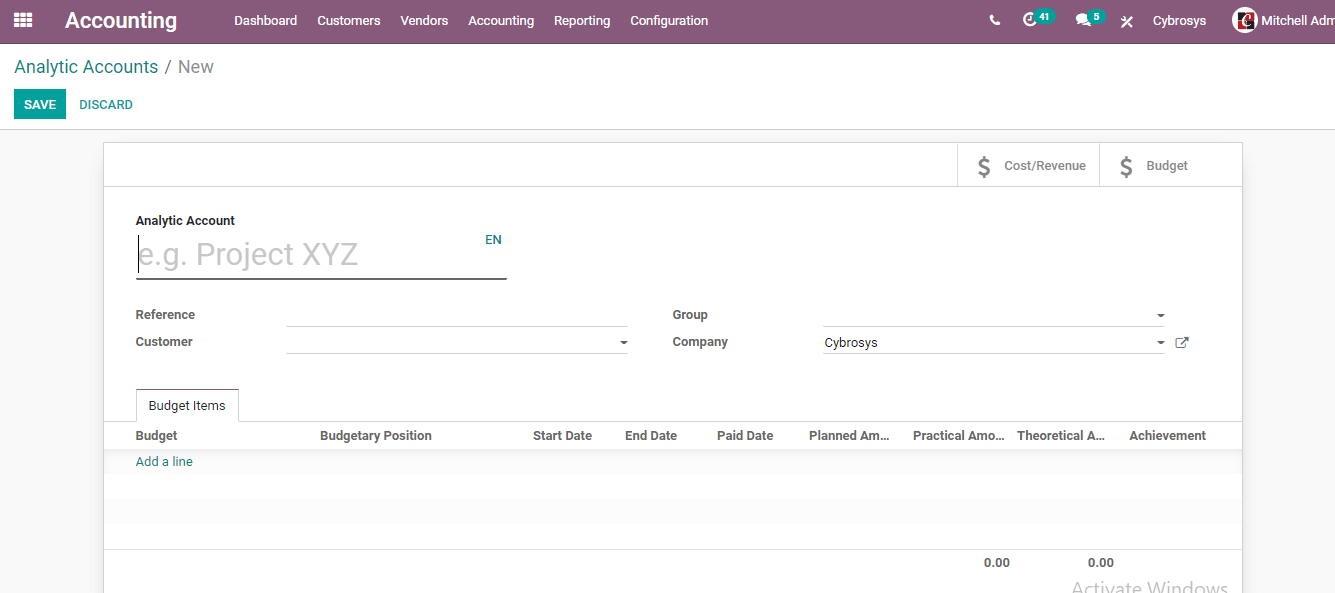
Here we can add different details like analytic account name, reference, customer details, group details, category, and other details,
On this page, we can also find the budget items including budget details along with budgetary position, start date, and end date.
In the above image, the group helps us to add multiple analytical accounts and get the analysis for multiple accounts.

Look at the above image and we can see that I have named the analytic account as CBMS Library. The reference has been given as Cybro 1 and customer Azure Interior. I have selected the group as a Department. We can also create a new group apart from selecting a group from the list. In order to do this, you have to create a group.
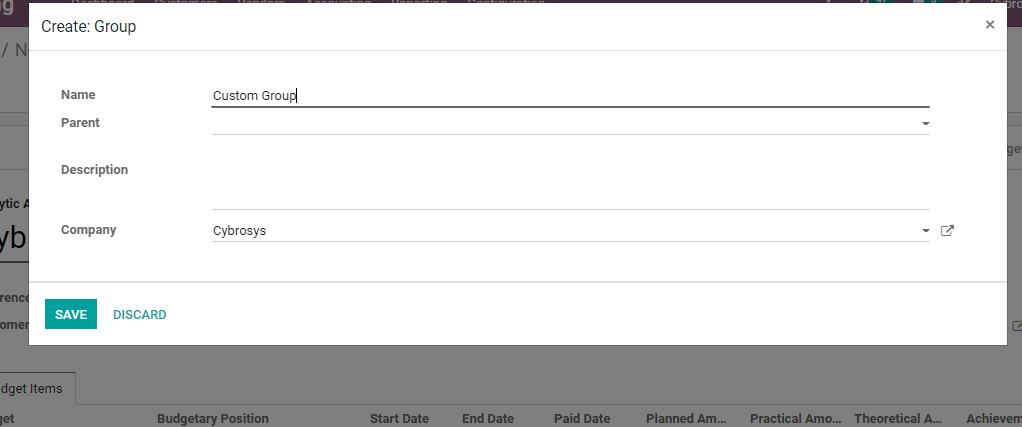
It is possible to complete this task with the help of the given pop-up window.
After completing this we can go ahead to create vendor bills. This can be chosen from Vendors. Here we can find the option bills.
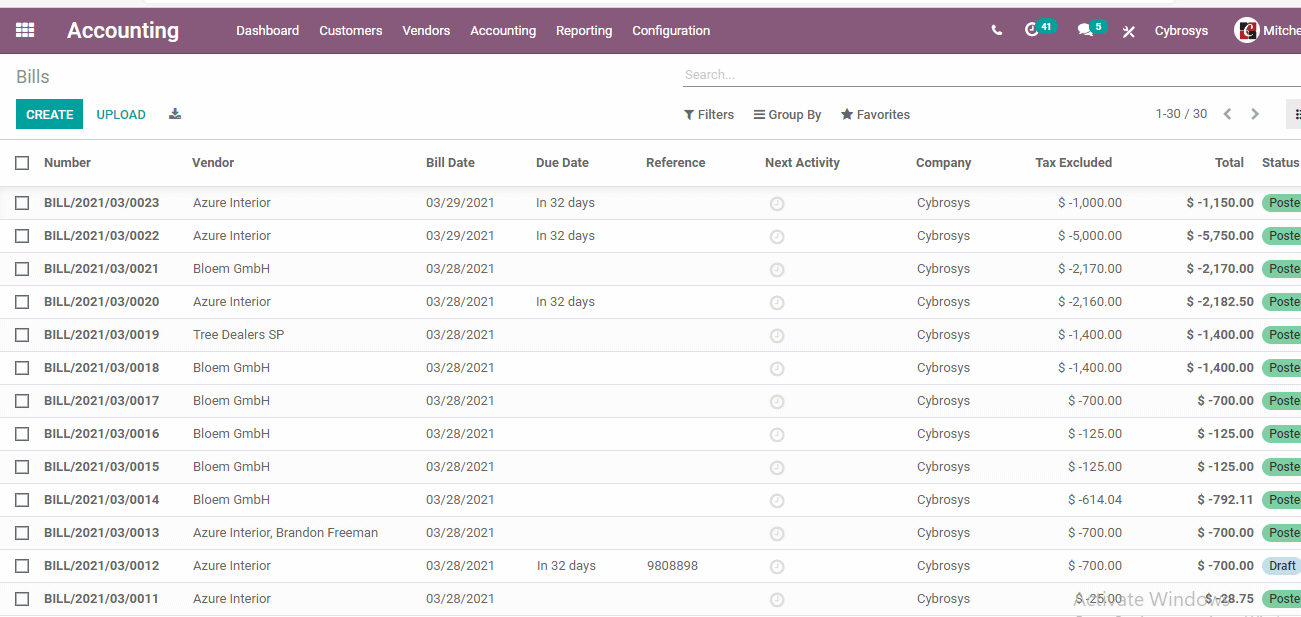
These are the existing vendor bills and now we can choose to create a new bill.
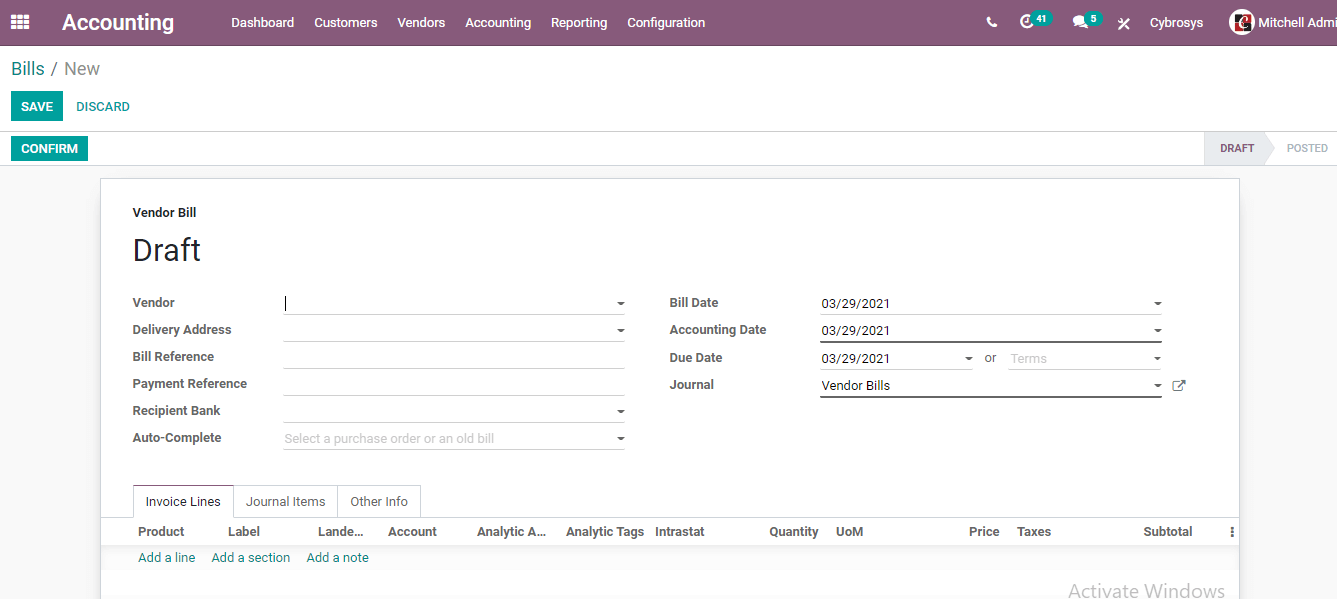
We have to add the necessary information here.
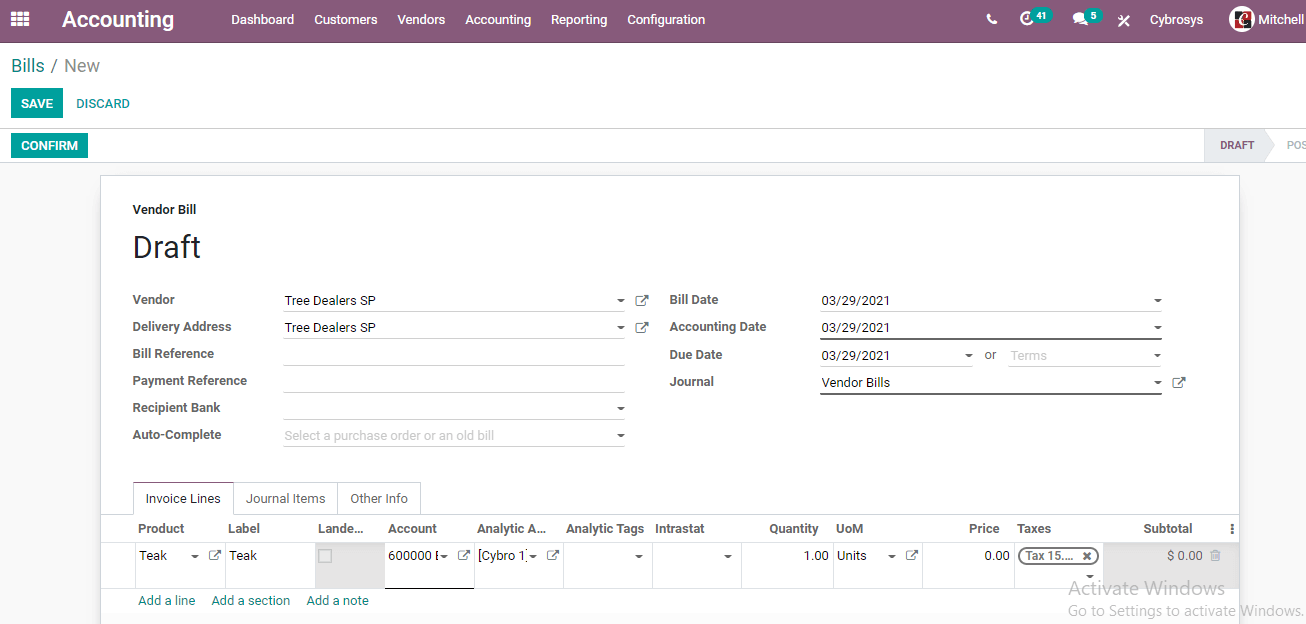
Here, we have selected the vendor, delivery address, product, label, and unit price. For analytic accounts, we have chosen the analytic account we created earlier. After adding all information we can confirm the operation.
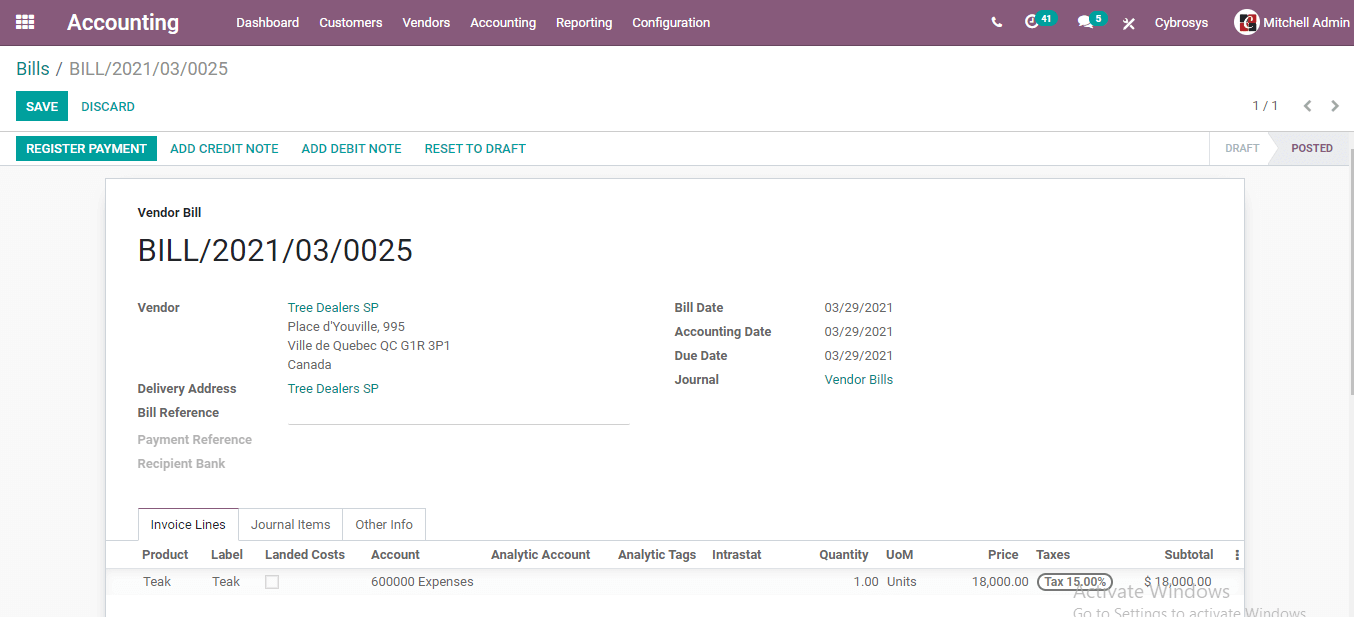
After confirming the operation we will have to choose the Register Payment button and then go to the Analytic Items option there.
Analytical Items
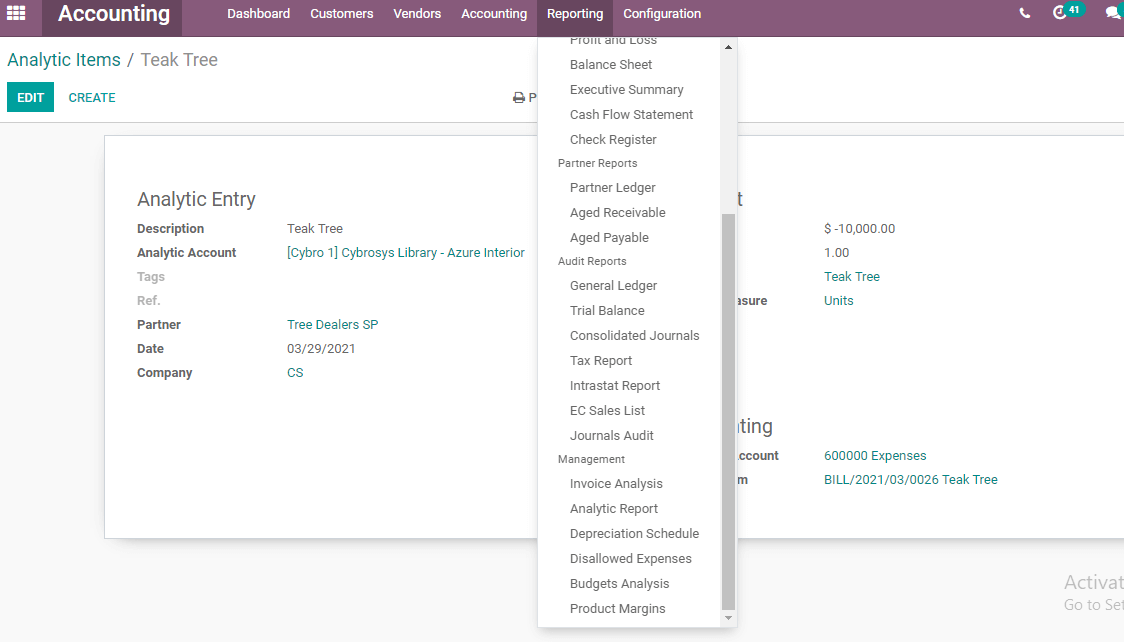
For this, we have to go to Configuration> Management> Analytic Items
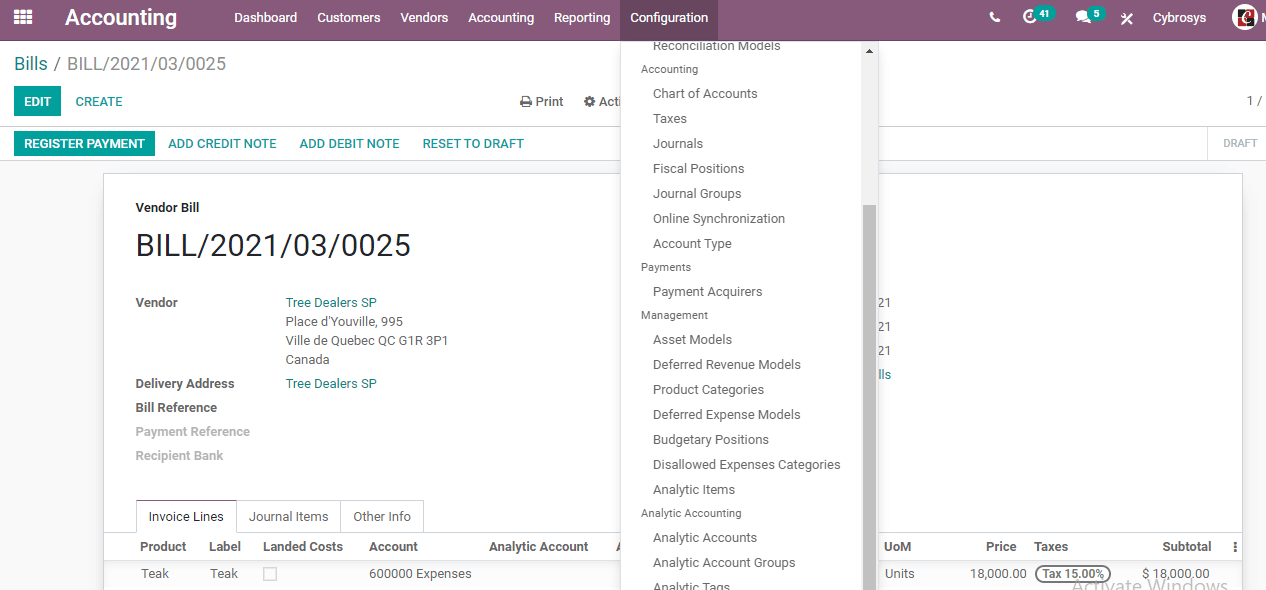
Here, we can create new analytic items. It is somewhat similar to journal items. But, here we can find only the items which will be part of the Analytic Account.

In the above image, we can find our analytic items along with the recently created item. We can click on the first item.
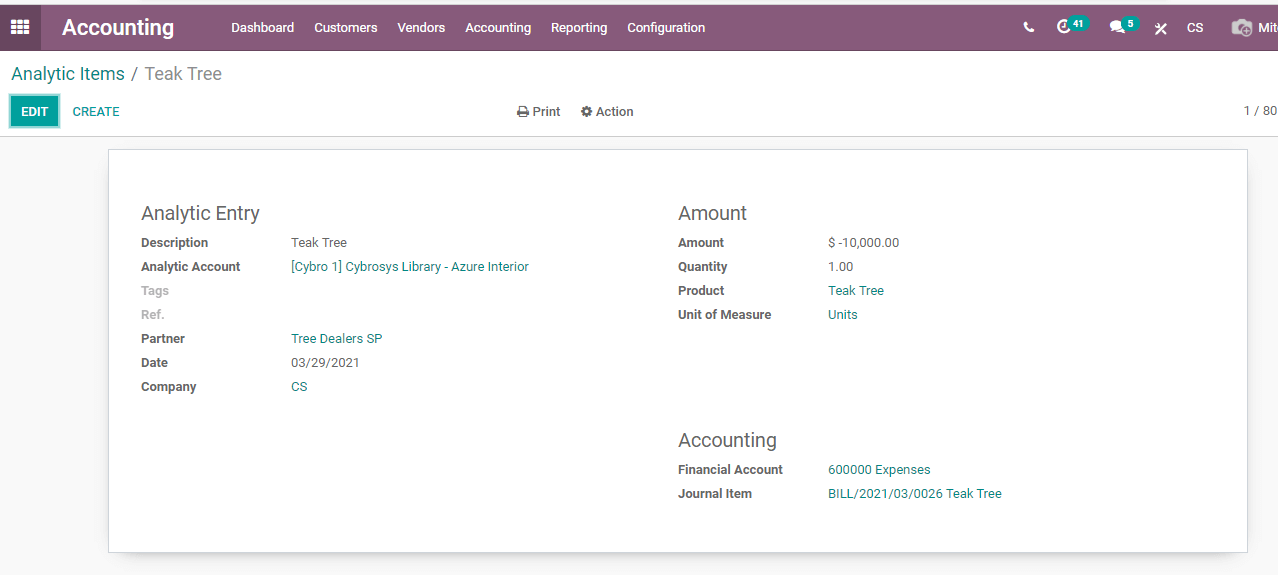
Here, we get a window where all information regarding the analytical item is available.
Now, it is time to move to analytical reporting.
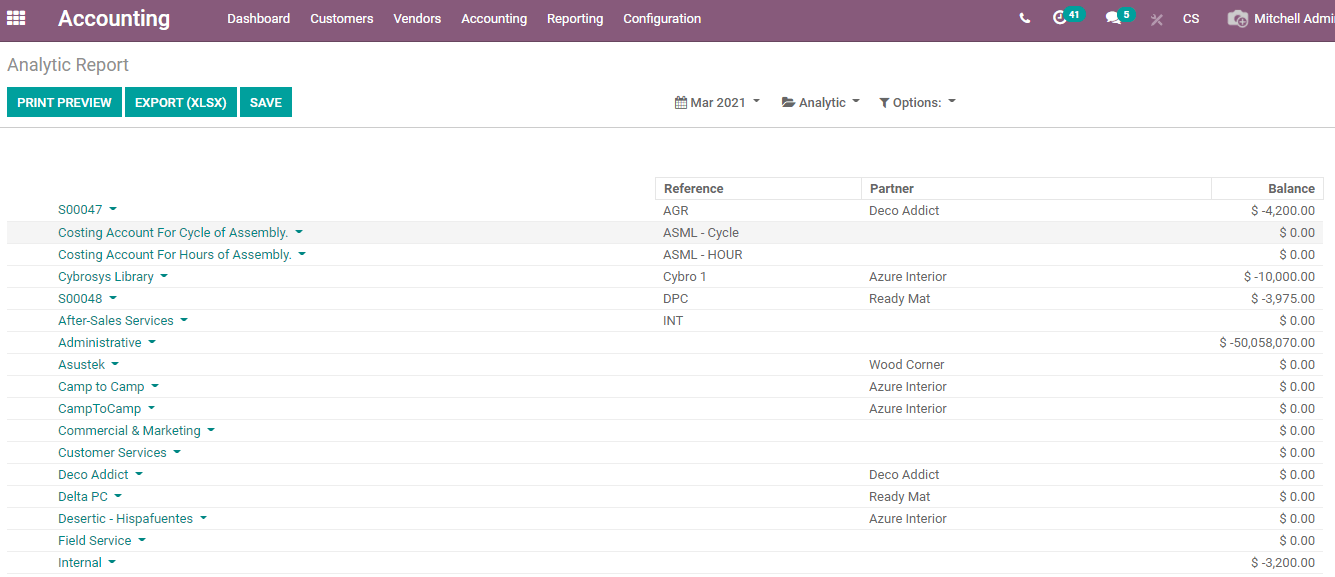
Analytical Report
We can now move on to the Analytical report. Here, we can view the analytical accounts and the balances. Here, the accounts will be listed on the left and balance on the right-hand side.
Here, we can check the analytic report for a specific period. We have options like a month, a quarter, or a year and this option can be selected from here.
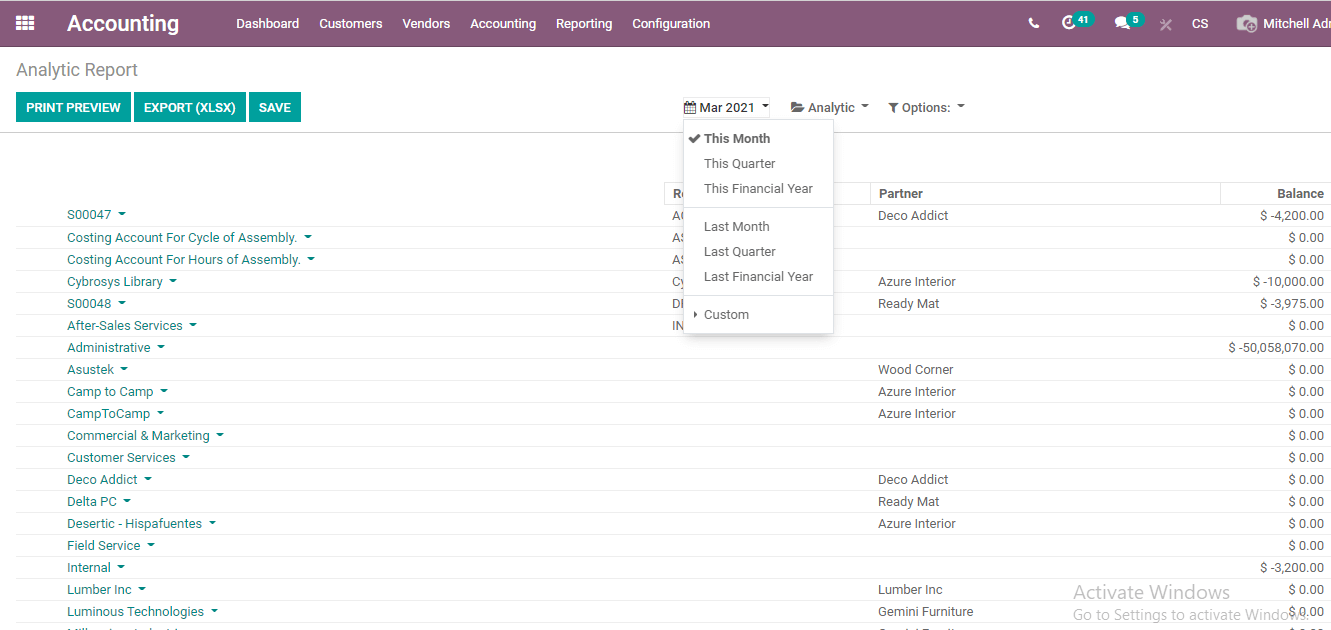
As you see, the above drop-down menu is given to help you in checking the period.
We can also choose a particular analytic account.

Odoo 14 also helps us to filter the accounts and reports. This option helps us to
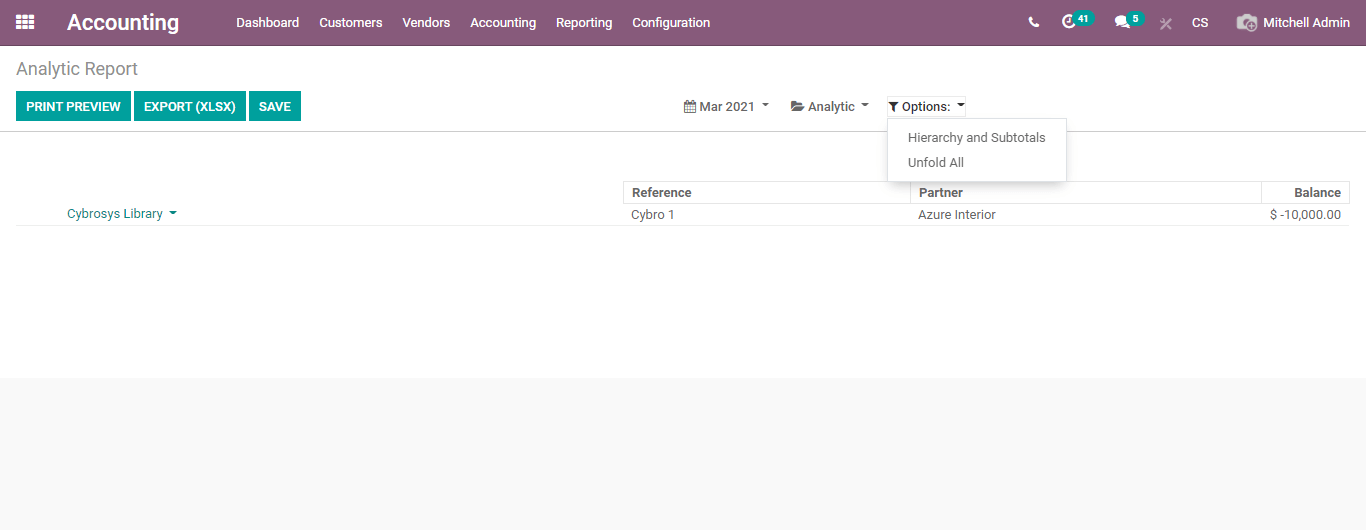
Among the options, we can find Hierarchy and subtotal.
On choosing the option we will get

Here, on the left side, we can find different groups including the custom group we created earlier.
On clicking on the custom group we can find the Analytic account we created, ie, CBMS Library. On clicking the option we will get the details of the account which was created by us.
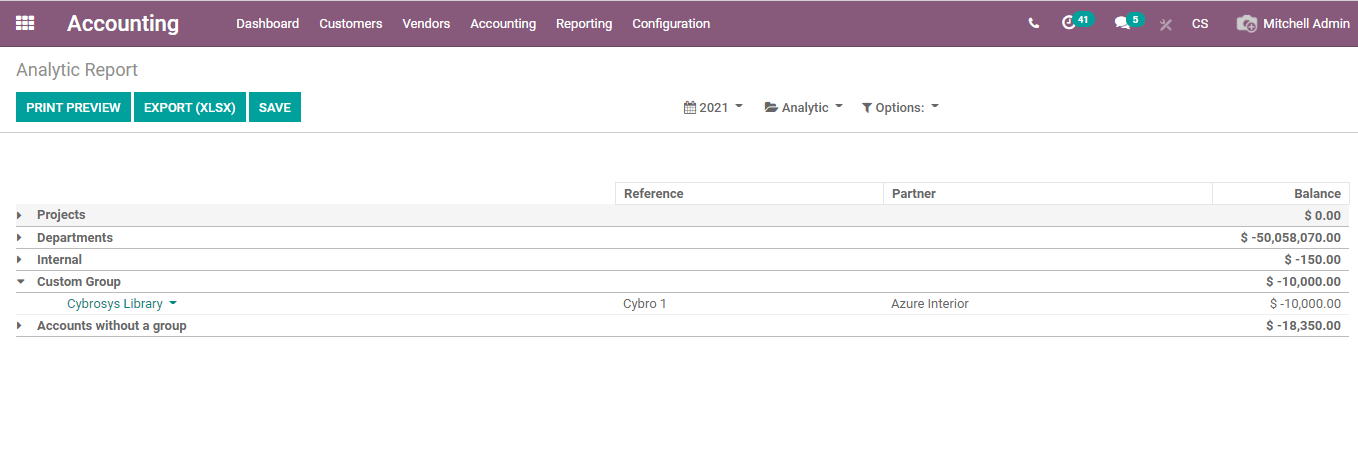
The balances for each group are displayed on the right-hand side.
We can also find a group named Accounts without a group
This is the account where all ungrouped accounts will be listed.
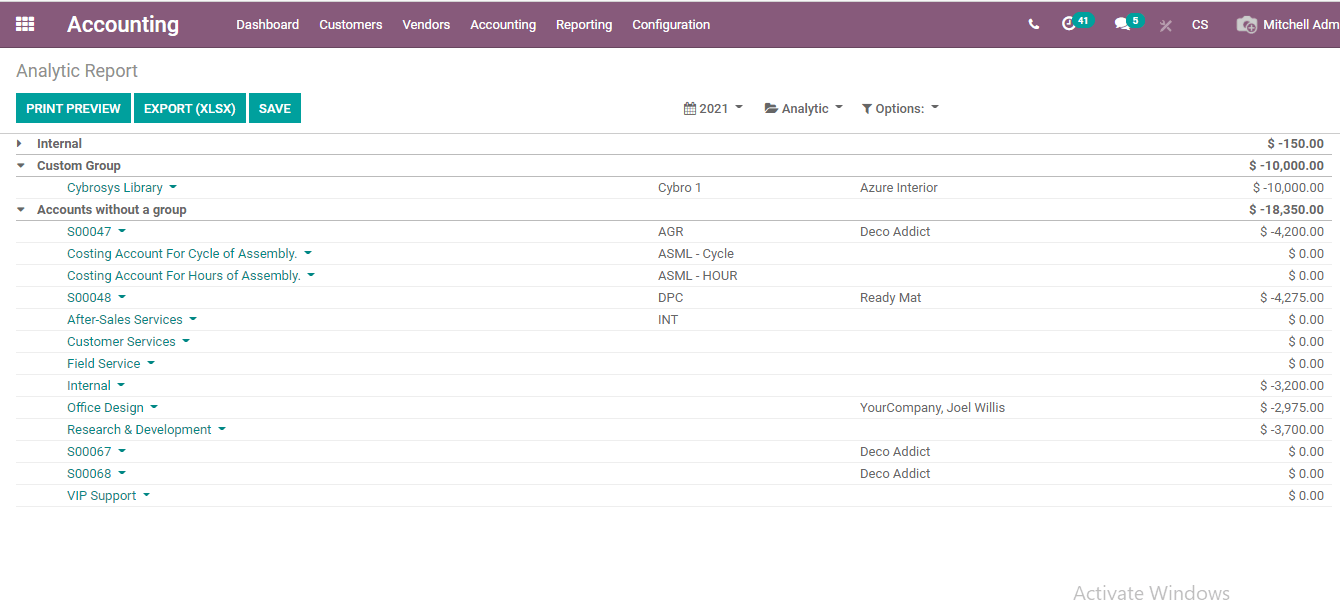
Here we can find different accounts and balances. Under this group, we will get the individual balances of an account.
Profit and Loss
Now we can move ahead and check Profit and Loss under the Reporting tab. Profit and loss being an important part of the report generation will help you to identify the actual benefit of the product.
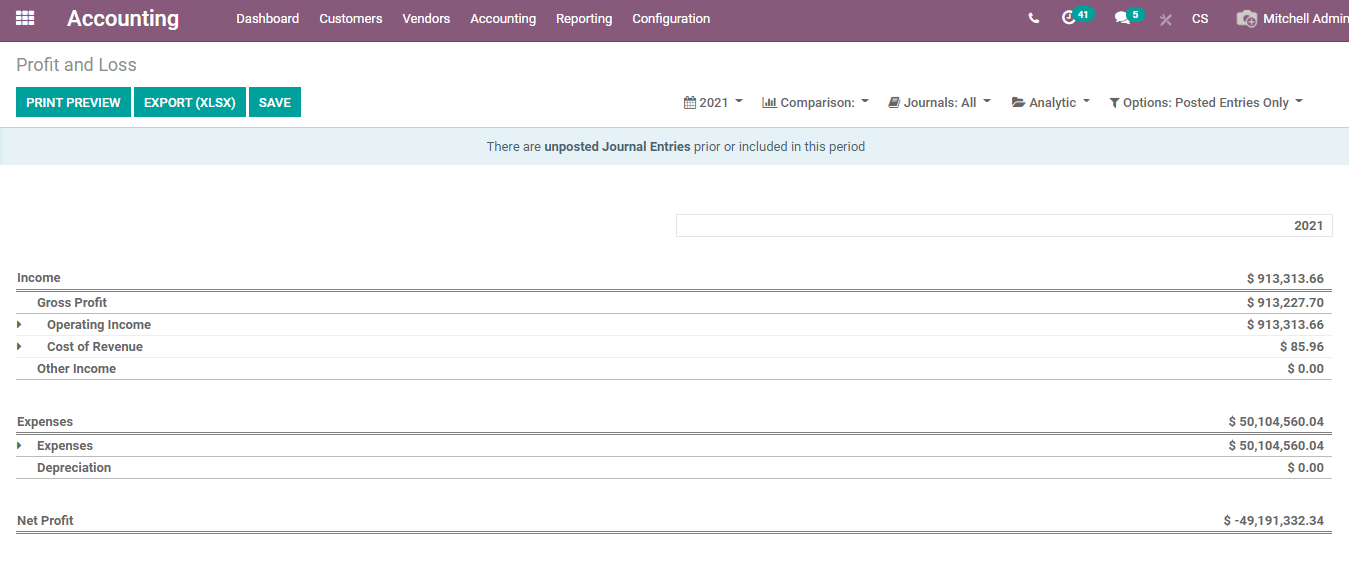
This is the profit and loss page
We can choose our analytic account from the analytic then check all expenses and depreciation related to this account
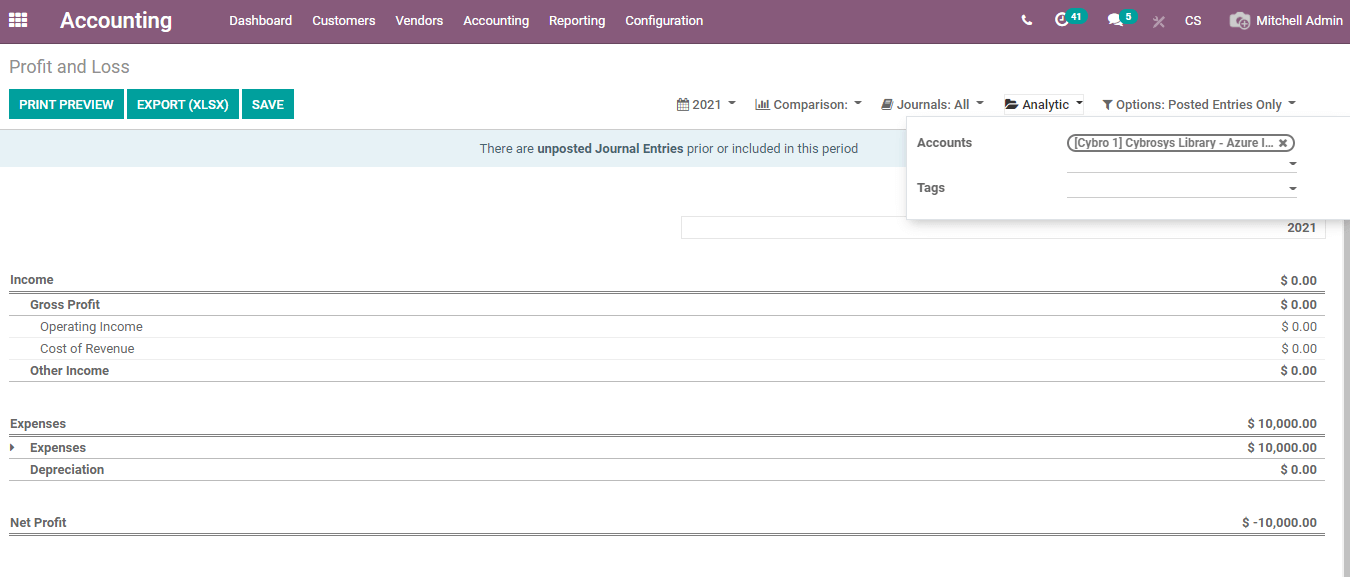
With this feature, the user will be able to trace all expenses and depreciation related to all your analytic accounts. The tool provides you support for viewing the operating cost and income on the account as well.
Comparison
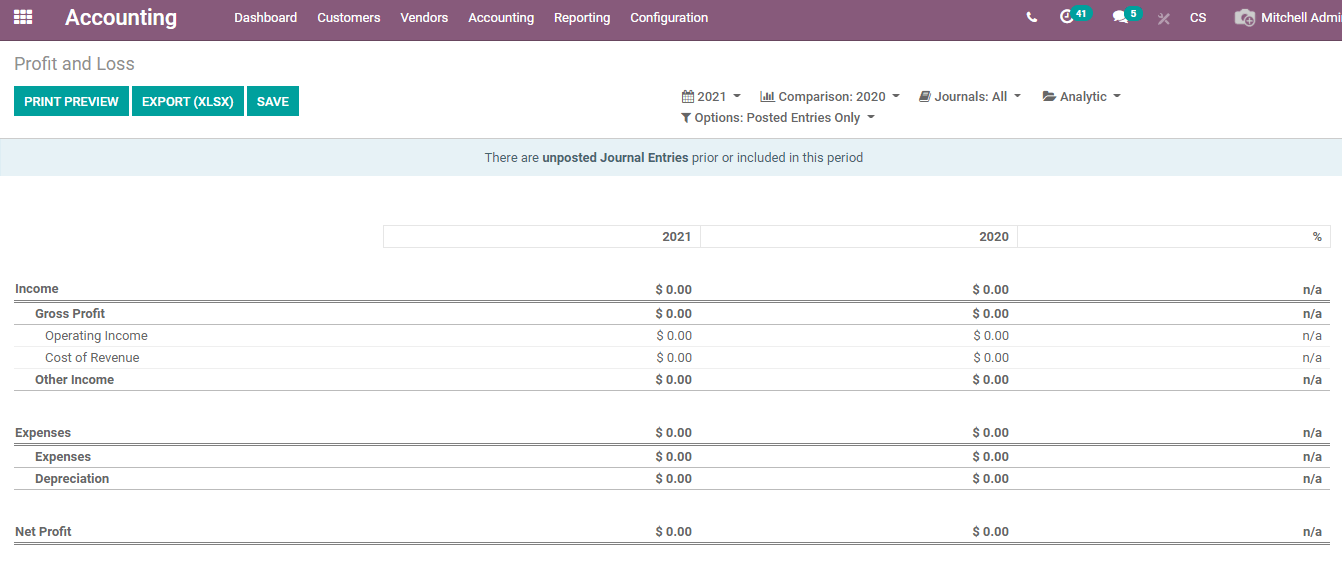
Comparison of business performance for different periods is the best way to plan strategies. Analytic accounts also offer this support.
Apart from managing analytic accounts, we can also create Analytic tags. This can help your business scale fresh heights. This feature is part of Odoo Accounting and it will surely help to manage different accounting-related features.
If you have any doubts regarding Odoo 14 Analytic Accounts you can visit www.mycbms.com


