Lead times are the periods of time taken to manufacture, deliver or receive a product. The lead times for purchase, sales and manufacture can be configured. The time period between the reception of order and shipping, by a vendor, is the vendor lead time. Manufacturing lead time is the time required to manufacture a product whereas, customer lead time is the time requires to deliver the product to the customers.
[wpcc-iframe loading=”lazy” width=”100%” height=”315″ src=”https://www.youtube.com/embed/5e_FRxVPCfM” frameborder=”0″ allow=”accelerometer; autoplay; encrypted-media; gyroscope; picture-in-picture” allowfullscreen=””]
Purchase Lead Time:
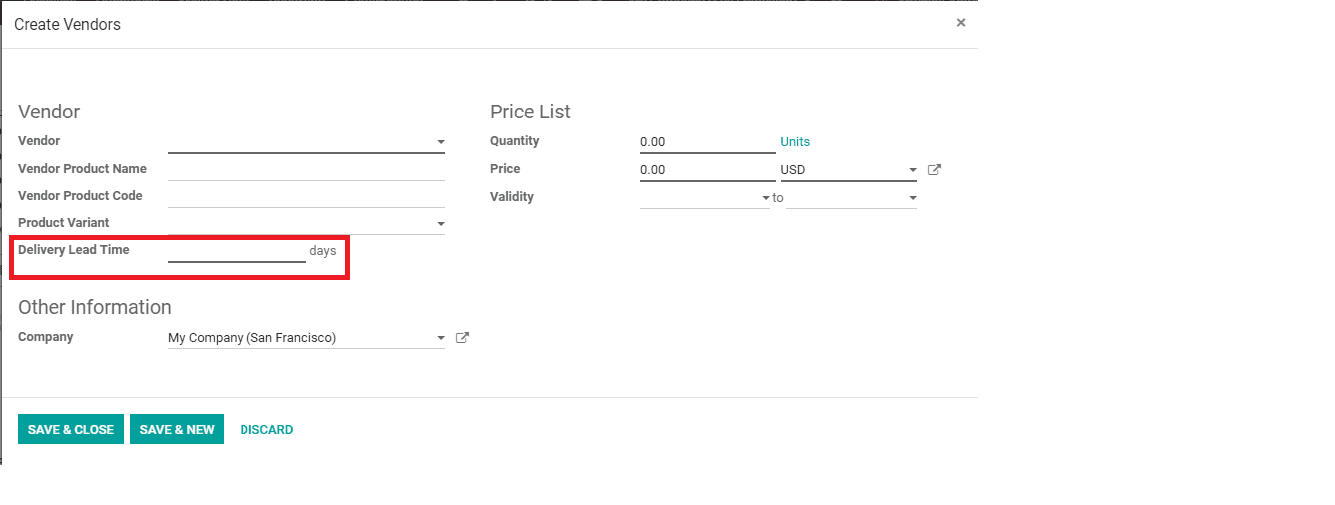
For configuring the delivery lead time, go to the Purchase tab under the Product and click on the vendor field. We can set the delivery lead time for both Vendors as well as Products here.

When the delivery lead time is provided with a certain number of days, during the creation of a purchase order, the Order date will be that particular number of days prior to the scheduled date.
Now, go to ‘Settings’ and search for ‘lead time’.
Select the security lead time and

Go to inventory and click on ‘Run Scheduler’ to run it. If the quantity on hand is the minimum set in the scheduler, an RFQ will be generated and sent to the corresponding vendor. Also, the Order date will be set two days prior to the current date.
Sale Lead Time:
In order to configure the security lead time;
Go to settings and search for lead time and select the ‘Security Lead time for Sales’ and enter the number of days requires. Here it is three.

After setting the security lead time, when a sales order is created the scheduled date will be shown three days prior to the committed date.
Customer Lead Time:
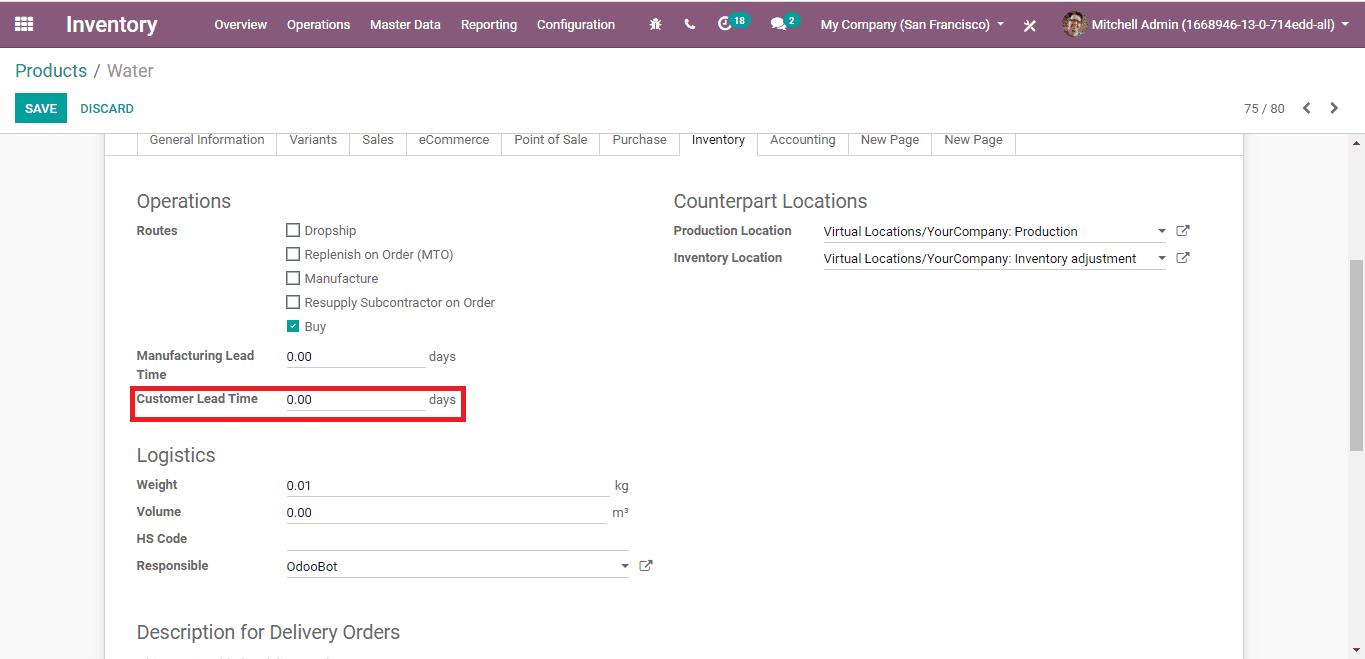
Go to ‘Products’ and under the Inventory tab, set the customer Lead Time

After entering the Customer Lead Time, when a sale order is made the confirmation date will be set as the provided number of dates (in Customer Lead Time) prior to the expected date and no change to the Scheduled Date, as described in the above paragraphs.
During the sale of two products with distinct Customer Lead Time, there will be two Shipping Policies available during the generation of Sale Order.
1. Deliver each product when available.
2. Deliver all products at once.
If the first one is selected, the product with the minimum lead time will be selected as the expected date. For example, if a product Bicycle with lead time 4 and a Scooter with 5 is sold to a customer, the lead time will be selected as 4.
If the second option is selected, the large number of lead time will be adopted as expected date that is, the lead time will be selected a 5 of Scooter, from the example above.
Manufacturing Lead Time:
Go to ‘Products’ and search for ‘Security Lead Time’ and select the security lead time in Manufacturing and enter the lead time.

After setting this the ‘Deadline start’ in the Manufacturing order will be changed. There won’t be any change in the Expected date and Confirmation date.
In this case, the Deadline Start will be set three prior to the Expected date as the lead time is set as three. The delivery date can be seen as 3 days later to the expected date after the manufacturing order is finished.
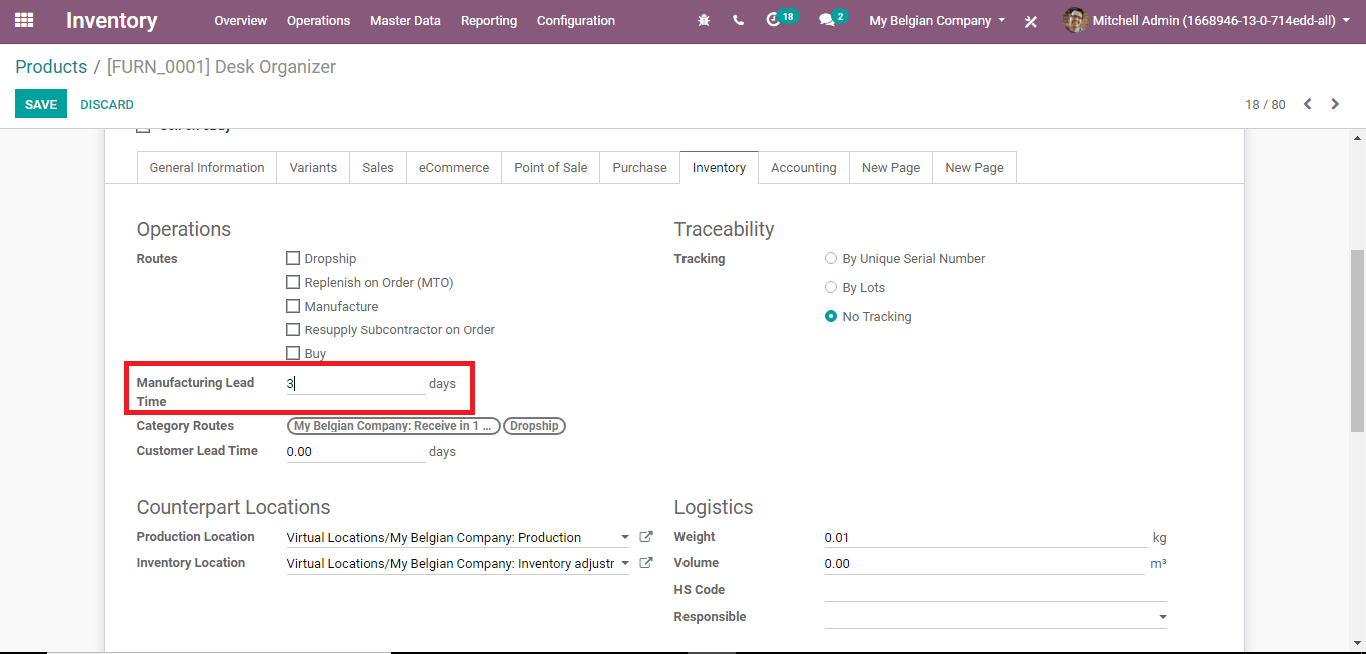
Go to Products under the ‘Inventory tab’ set the Manufacturing lead time as 3 (from the above-given example). Now the Deadline Start will be set as three days prior to the Expected date.

The Delivery date will be set as three days later to the expected date after the Manufacturing order is finished.
This is how we can set the lead times in Odoo 13


