More than two data combine effortlessly into a single data set through the data merging process. It is necessary to find out raw data stored in worksheets, documents, and files. Odoo 15 Data Cleaning module provides a Merge action Manager feature to easily configure and merge your data. The data cleaning becomes a simple task by configuring Deduplication rules and Field Cleaning from the Odoo 15 Data Cleaning module. In addition, the module also integrated with other applications such as contacts, CRM, Documents and more to remove the documents clutter due to duplication.
This blog enables you to understand the Merge action Manager menu in Odoo 15 Data Cleaning module
One of the essential spaces for data cleaning your documents in a business is the Odoo 15 Data Cleaning module. An ERP system resolves all your data duplication regarding customer details, contacts, documents, etc. Let’s discuss a detailed analysis of Merge action Manager in the Data Cleaning dashboard.
Merge action Manager
The Configuration feature of the Data Cleaning dashboard consists of various menus, including Merge action Manager, Field Cleaning and Deduplication Rules. Choose the Merge action Manager menu from the Configuration tab of the Odoo 15 Data Cleaning dashboard. We can access all created models in the Merge action Manager window, as displayed in the screenshot below.
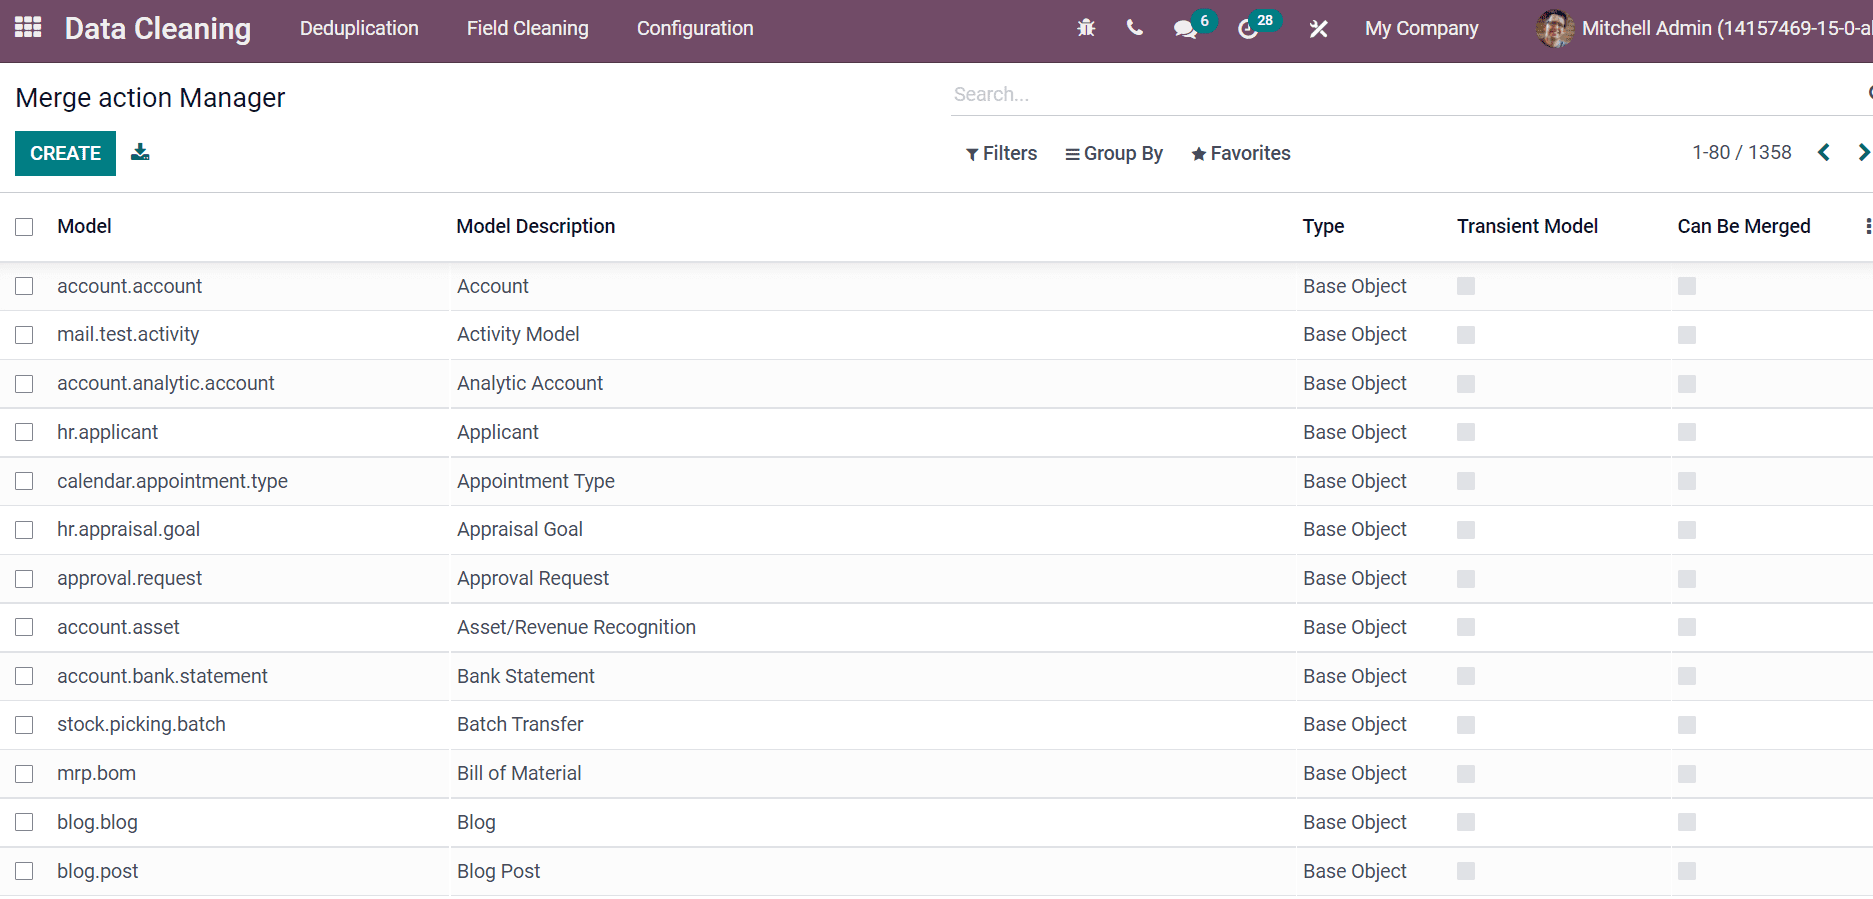
Here, you can access the details, including Model, Type, Transient Model, Model Description and more aspects from the Merge action Manager window. By clicking on a specific Model title, you get a detailed view of each merge action manager created on the screen. The three-dot button at the right end of the window assists you to Add Custom Field into the Merge action Manager window. Users can develop a new Mege action Manager for a model using the Create icon. A new page opens before the user, and we can create a new merge action manager model.
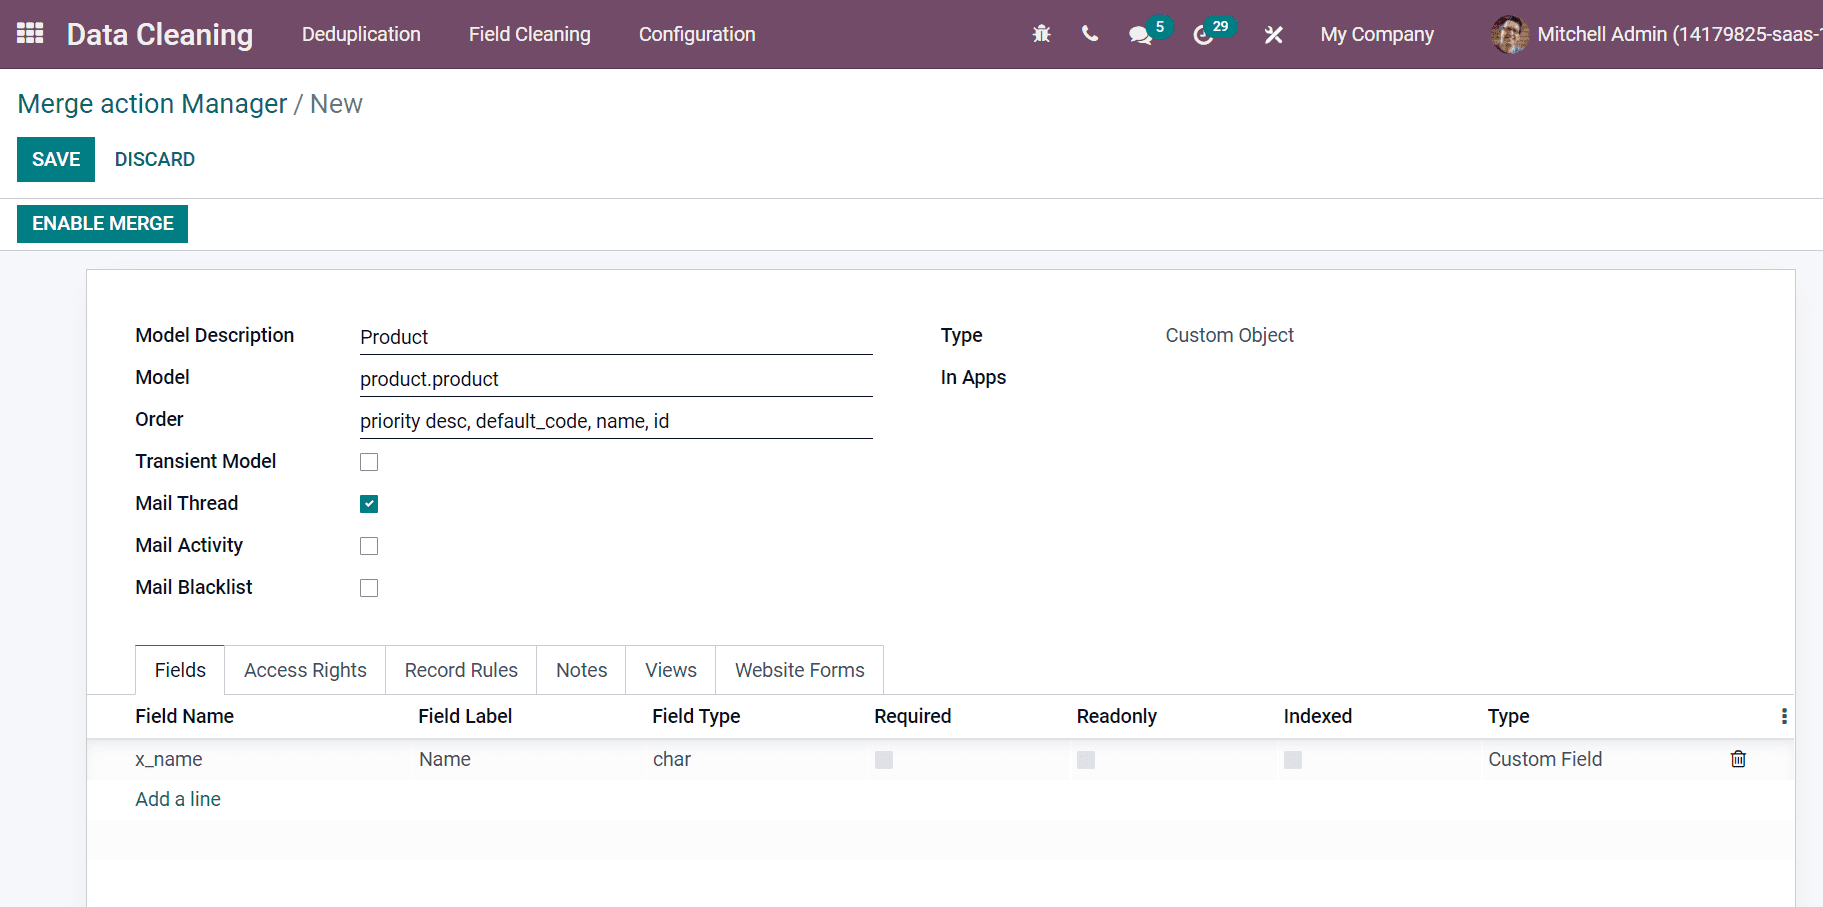
We can create a model as ‘Product’ in the Merge action Manager screen. Add the description of the model inside the Model Description field. Later, enter the model name in the Model section. Inside the Order field, apply the SQL expression for ordering records in the model. SQL means Structured Query Language, and SQL expression depicts the combining of more values, functions and operations results in an accurate value. Users can also enable the Transient Model and activate the Mail Thread assist to support messages and notifications for your model. Moreover, we can support the activities of the model by enabling the Mail Activity field. The activation of Mail Blacklist supports the Blacklist of your model, as depicted in the screenshot below.
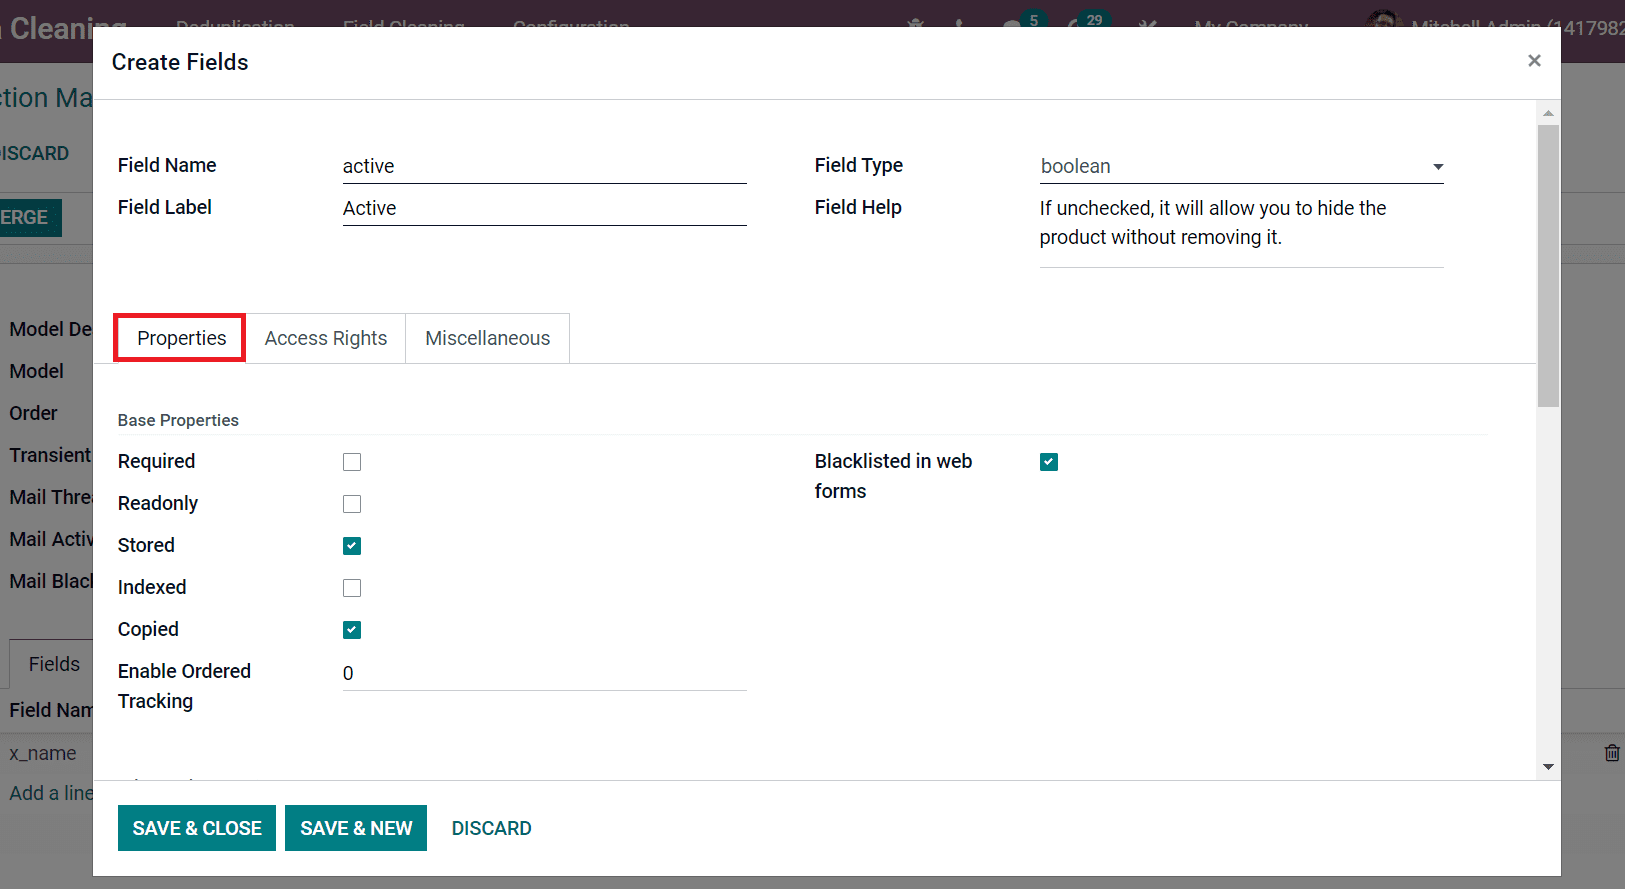
We can add a particular field name for your model by clicking on Add a line option from the Fields tab. A new Field window appears before you when selecting the Add a line option. Here, users can add the Field Name/Label and select the Field Type from the dropdown section. You can add the message for your specific field name inside the Field Help field. Below the Properties tab of the Fields window, you can access Base Properties and Advanced Properties. You can enable the Base Properties for your models such as Required, Indexed, Read only, and more. Users can activate the Stored field whether the value is stored in the database, and Copied field enables when the value is copied at the time of duplicating a record. Every modification is done to a particular field track quickly by Enable Ordered Tracking, and it is used to order tracking values. As displayed in the screenshot below, we can blacklist the specific field for web forms by activating the Blacklisted in web forms.
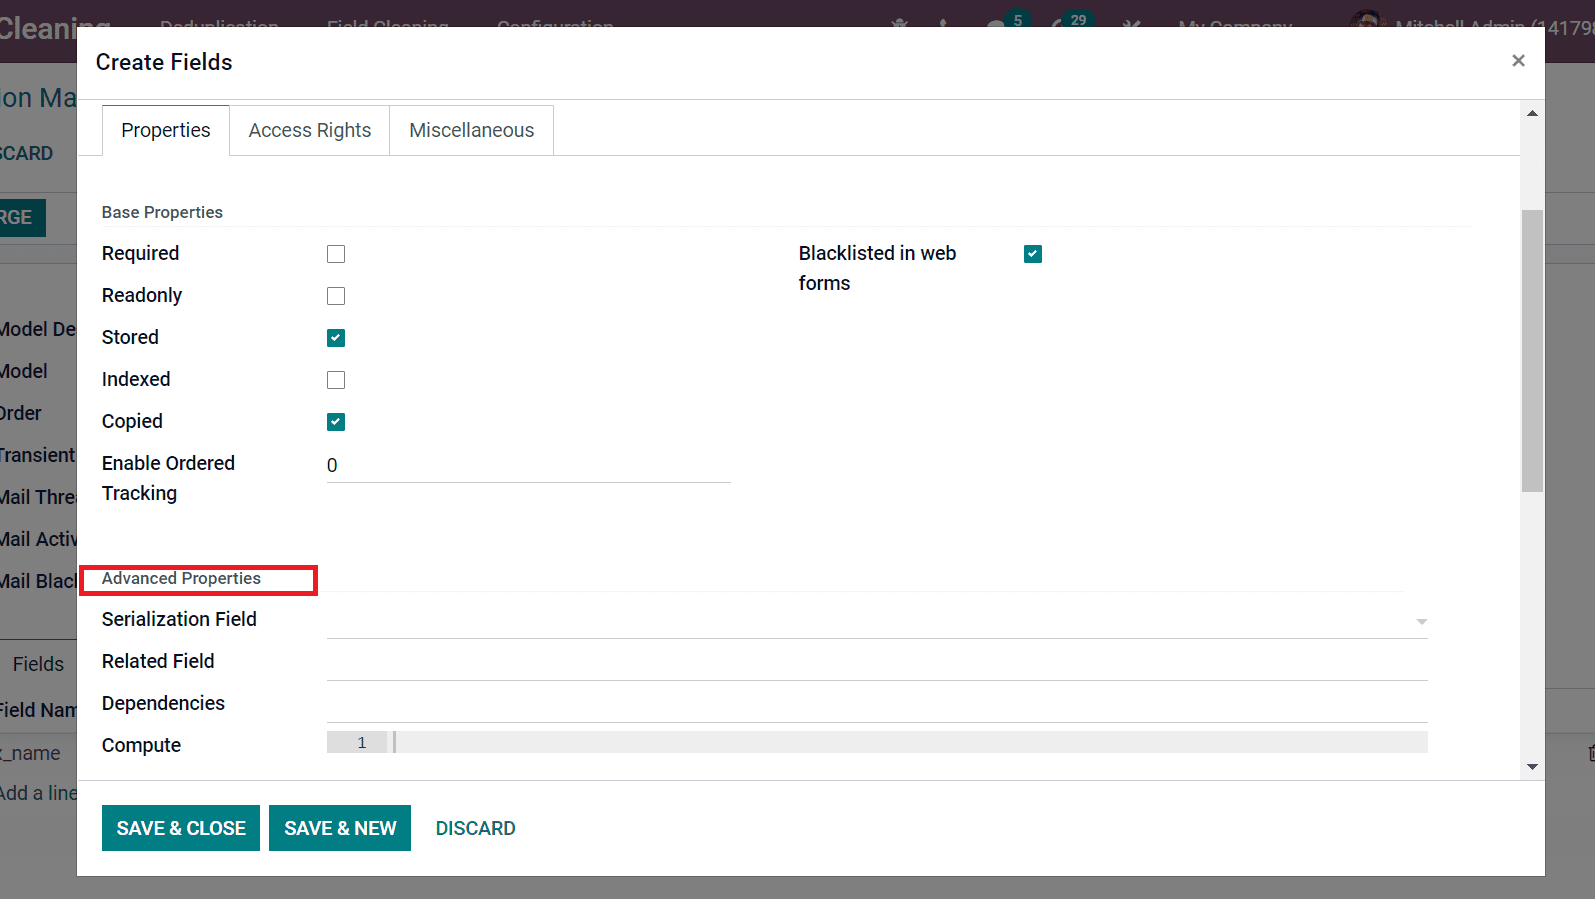
In the Advanced Properties section, you can choose the Serialization Field that ensures to store the structure of the serialization field instead of its database. After the creation, we cannot change it. A dot-separated list of field names enters the Related Field. Dependencies and Compute fields define the computed fields, and the current field depends on lists inside the Dependencies section. In the compute method, we can enter fields names separated by commas such as Name, size etc. Users can add a code to compute the field values inside the Compute field. It is in python code format to set the records.
You can select a Group Name for the field from the Access Rights tab. By selecting Add a line option, the user can choose a Group Name from the new window. At last, click on Save & Close icon to create your field name, as shown in the screenshot below.
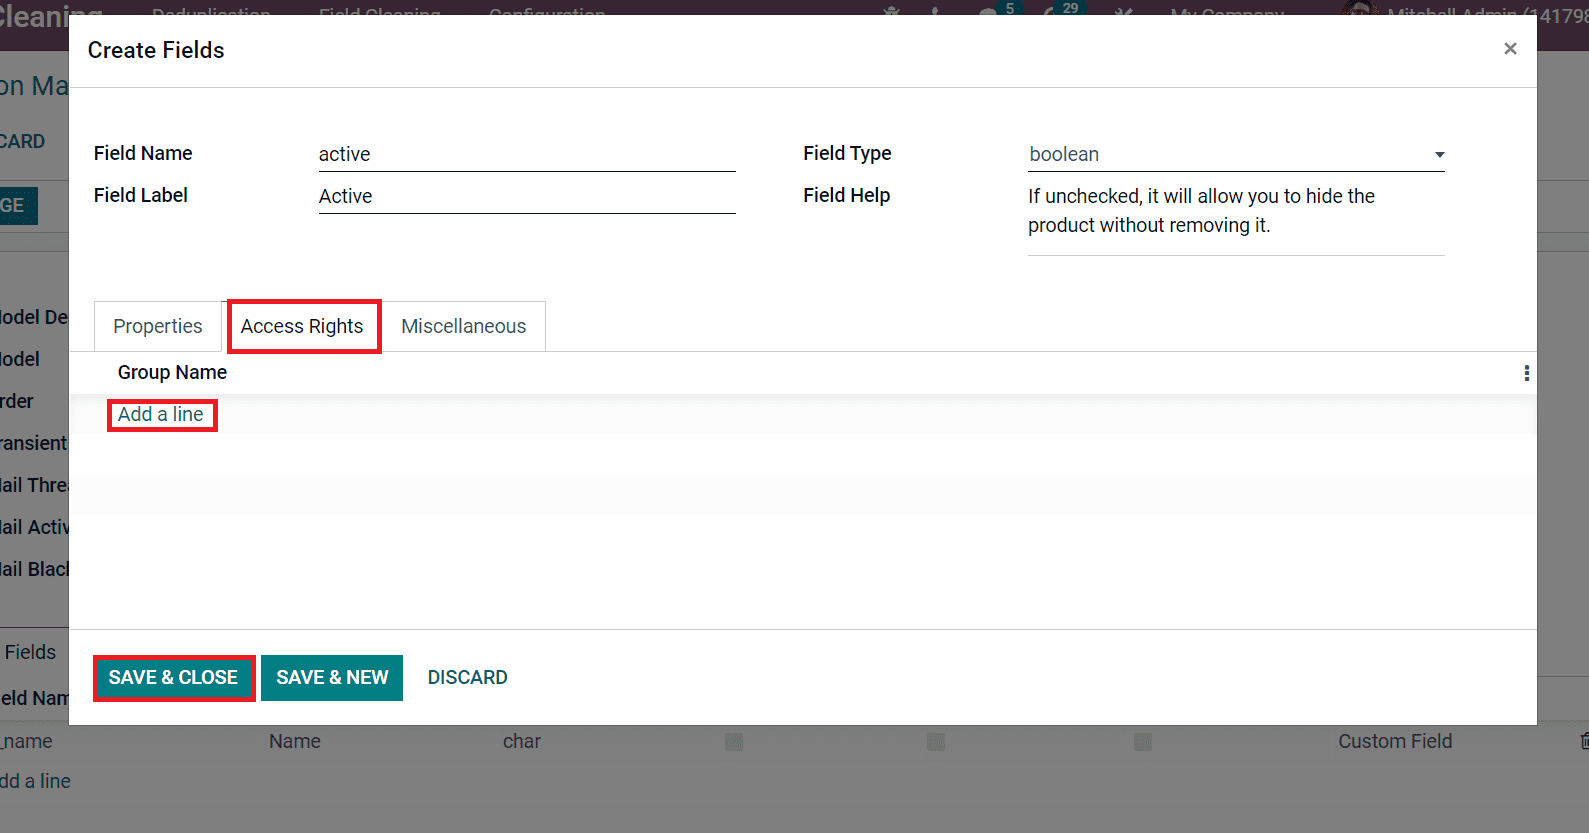
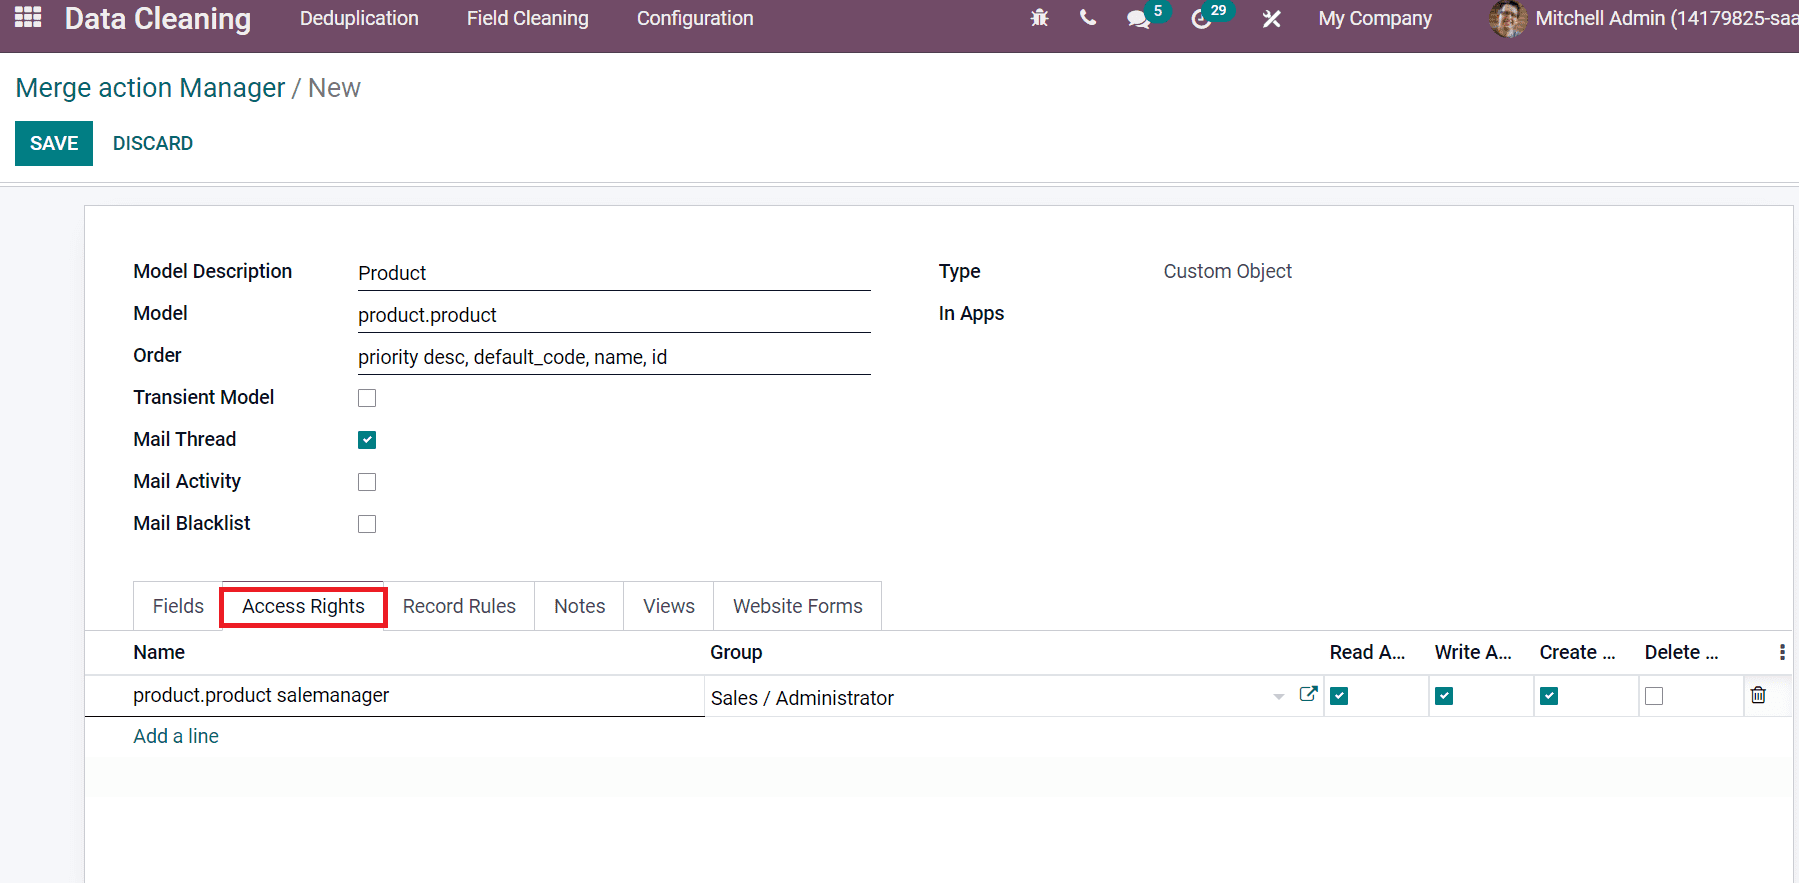
In this way, we can develop various Field Names for your model from the Fields tab. Later, add the Name and Group for your model inside the Access Rights tab. After selecting Add a line option, a space bar opens below the Name and you can add your value here. Later, choose the specific Group for your Name from the dropdown list. We can also enable the accessibility for reading, writing, creating and deleting from the Access Rights tab, as displayed in the screenshot below.
Users can add information about models inside the Notes tab. The forms related setting enables it easily with the Website Forms. We can activate the form builder feature for your model by allowing the Allowed to use in the Forms field. The form action label is set inside the Label for form action. You can specify the field that contains meta and custom form data from the Field for Custom Form data field.
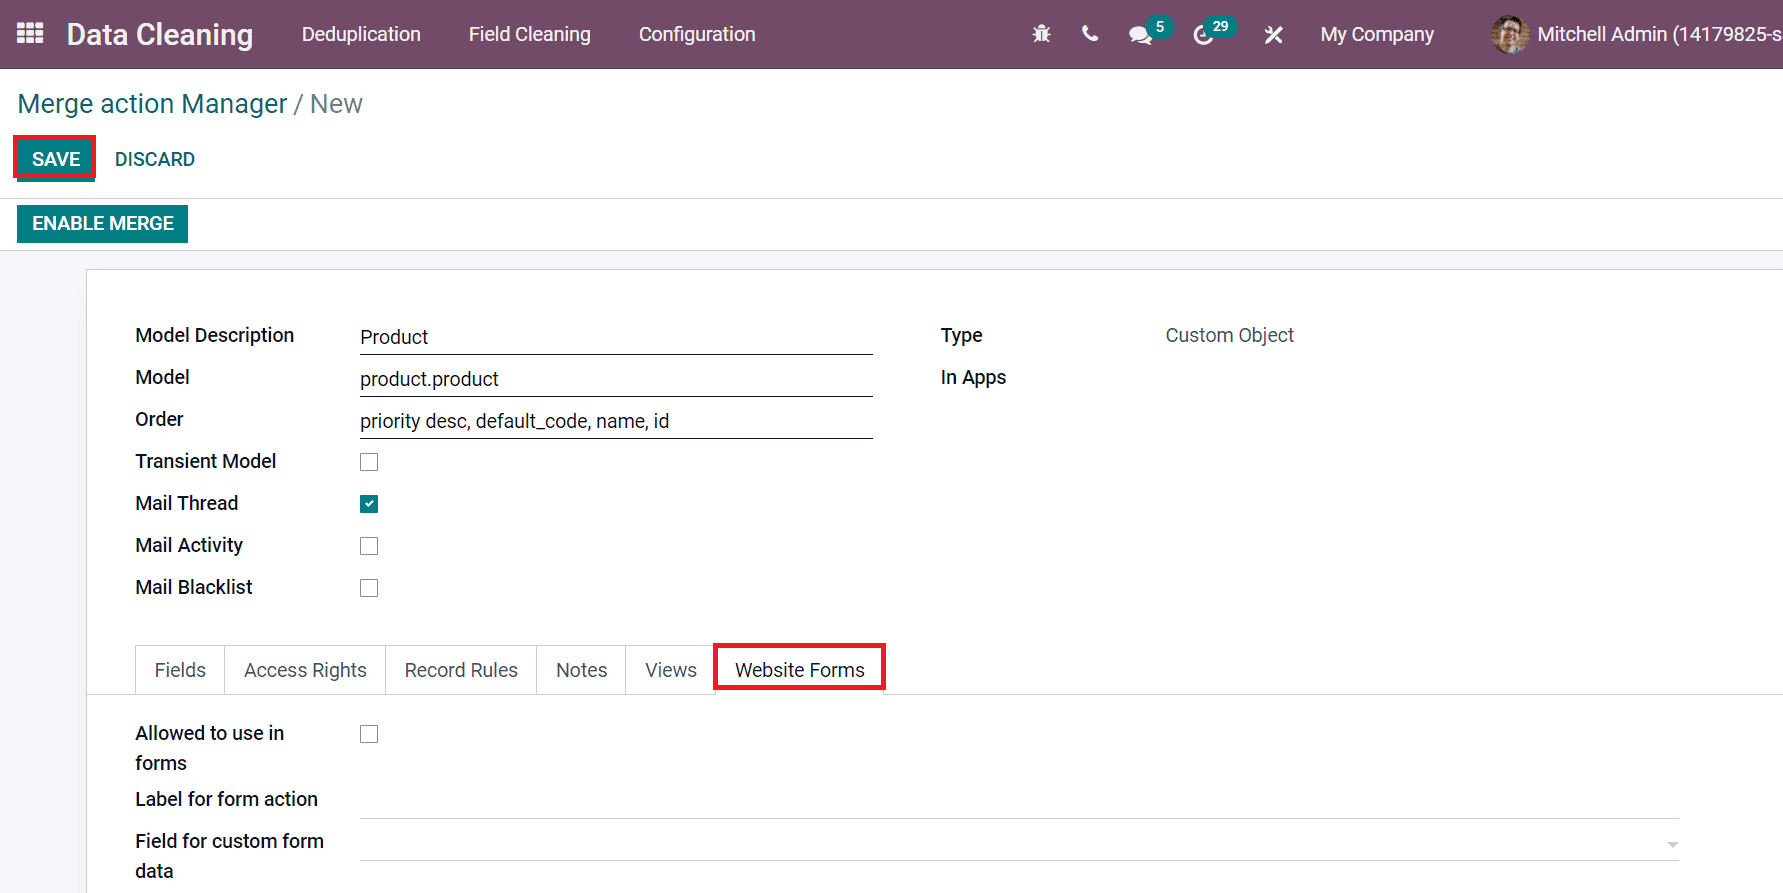
After adding all details, select the Save icon to impart your new model, as displayed in the screenshot above. You can formulate the merging for your model by choosing the Enable Merge option in the Merge action Manager window. The created model is viewable in the Merge action Manager window along with other models.
Users can configure the Access Rights, Notes, Field name, and Website Forms in the Merge action Manager on Odoo 15 Data Cleaning module. The Merge action Manager menu on the Configuration feature provides all the details of several models in your database. The merging of data models becomes easy with the advanced peculiarities of the Odoo 15 Data Cleaning module.


