The Odoo platform makes it possible to sell product variants using attributes. We know the products have different variations such as size, color, materials, dimensions, etc. Applying an automated solution for managing variants is very useful. The Odoo platform allows you to handle all these product variants effectively.
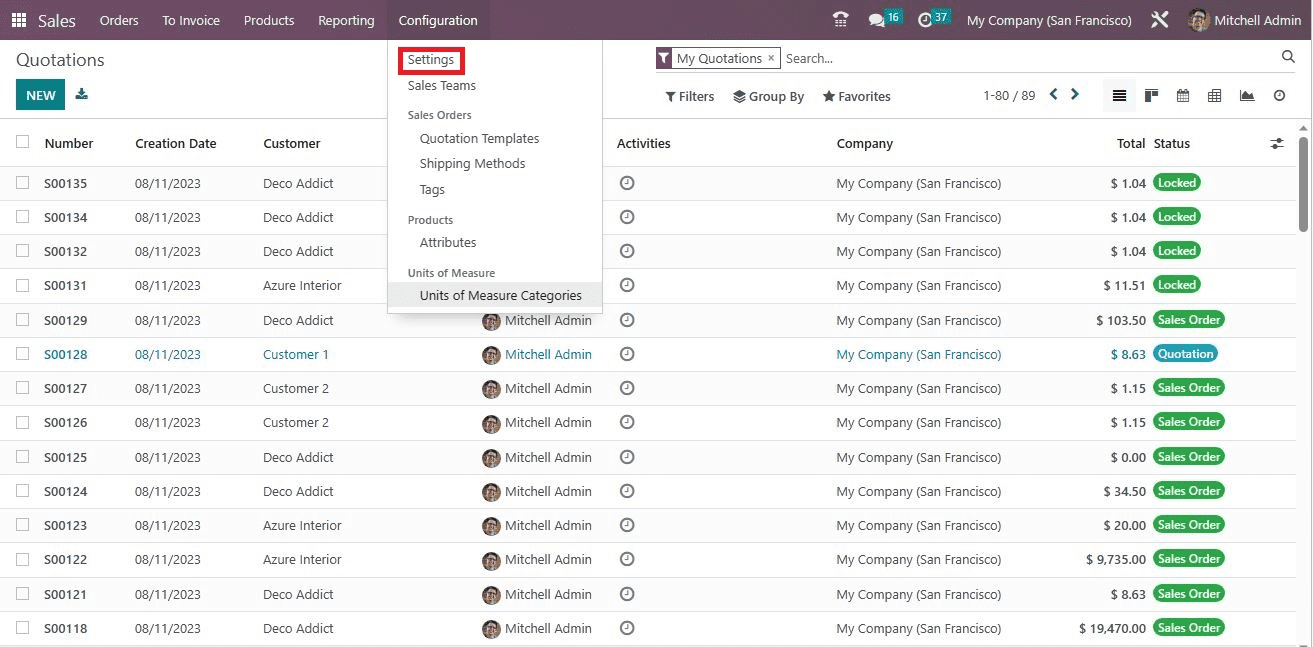
In the Odoo Sales module, you have innovative tools and features to take care of product variants. For selling products using attributes in the Odoo 16 platform, you should go to the Settings window of the Odoo Sales module to activate the option.
To access the Settings window, you can click on the Configuration tab available on the top menu bar of the platform. Under the Configuration tab, you can see the Settings menu, as shown below.
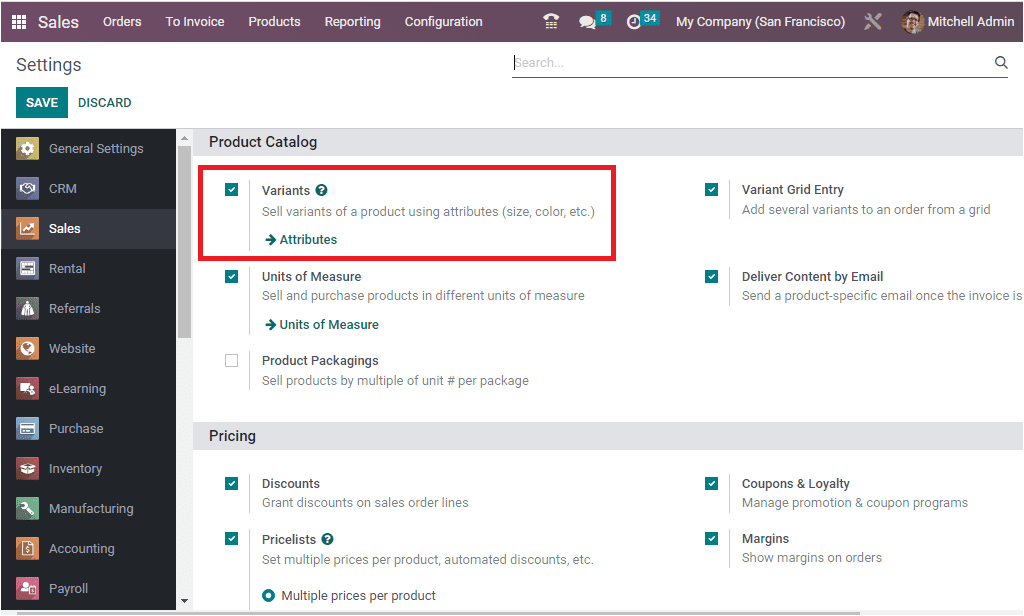
The moment you click on the Settings menu, the system will take you to the Settings window. Here in the Settings window, you are able to see the Variants option. You can activate the option to take advantage of it. Also, you can view the Variant Grid Entry option, which can also be enabled for adding several variants to order from a grid.
Now, you will be able to view the Attribute option in the product section available under the Configuration tab. With the help of this menu, you can open the Attributes window. The Attribute option in the Odoo platform is very useful for differentiating product variants.
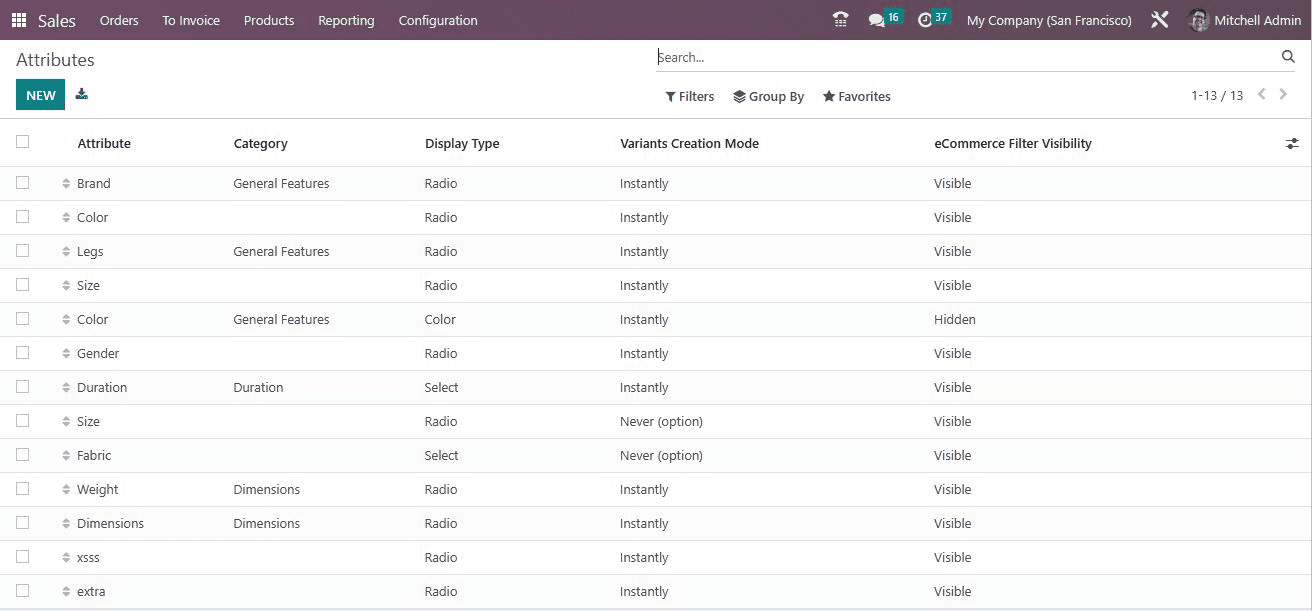
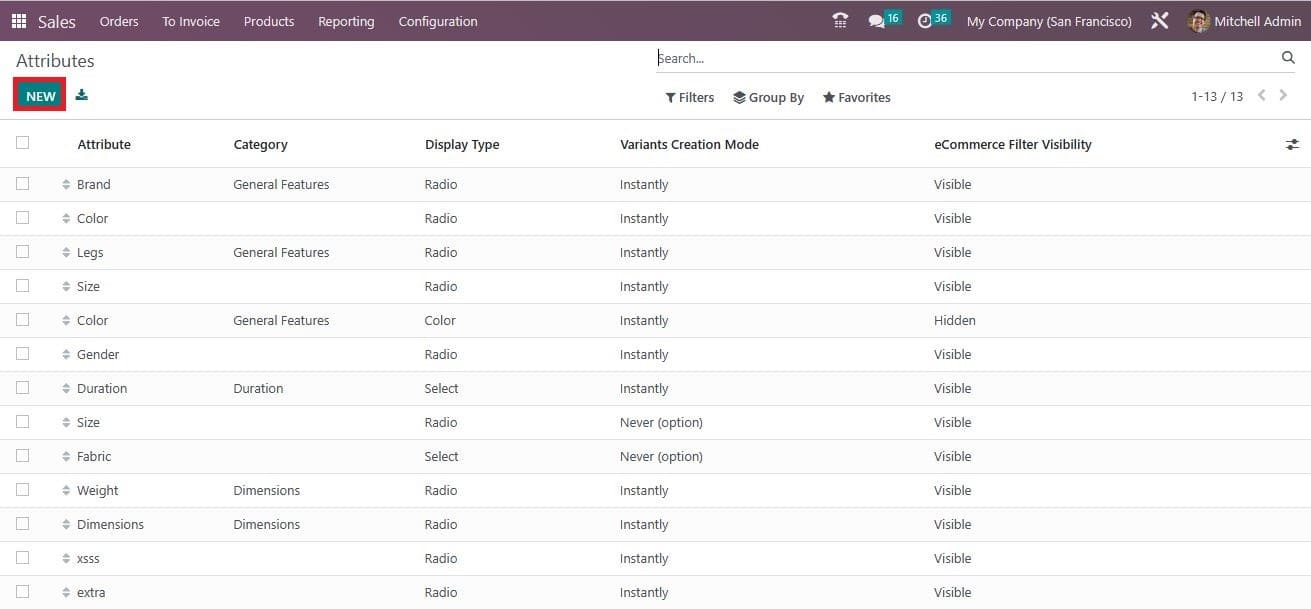
Before creating variants, we have to set up the Attributes. Here, the Attributes window is designed in a way that it can display a preview of the attribute that we have already configured in the platform. Each attribute will be displayed along with the Attribute Name, Category, Display Type, Variants Creation Mode, and eCommerce Filter visibility. If you are required to view the full details of any particular Attribute, you can select the respective attributes with a single click. Then, the system will display all the details in front of you. It is also very simple to create a new Attribute. You just need to select the NEW button, which is available in the top left corner of the window.
Let us have a look at the creation window.
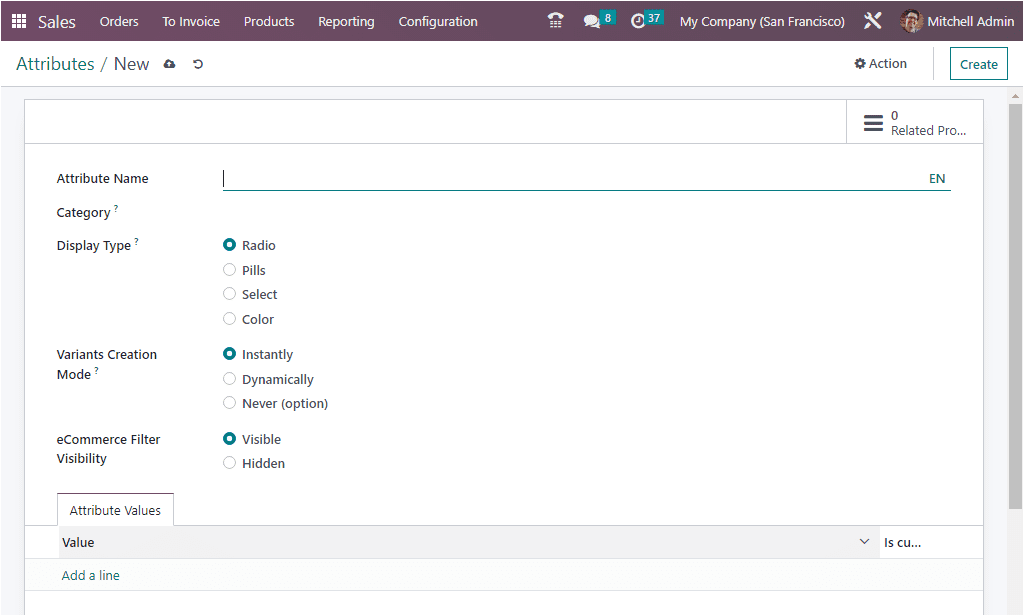
In the Attribute form view, you can give the attribute’s name in the Attribute Name field. Then, you can allocate a category in the Category field to regroup similar attributes under the same section on the comparison page of eCommerce. Similarly, the display type applied in the product configurator can be chosen between options like Radio, Pills, Select, and Color. Likewise, you will also have the choice to select the Variants Creation Mode. The mode can be set Instantly, Dynamically, or Never (option). The Mode is very significant in determining when the variants want to be created. The ‘Instantly’ option allows you to create variants as soon as the attributes and values are added to a product. The Dynamically option can be applied if you only want to create variants after their corresponding attributes and values are added to a sales order. If you select the Never option, the variants are never created for the attribute. It should also be kept in mind that the variant creation mode cannot be changed once the attribute is used on at least one product. The eCommerce Filter Visibility can be set to either Visible or Hidden. If you make it visible, it will be able to filter the product using the attributes.
Under the Attribute Values field, you can add various attributes that you really require using the Add a Line option. Further, you can mark a value as a custom by enabling the box given in the right corner. This way, you can create various attributes.
Now let us open the Products tab to create a new product with various attributes. So, let us go to the Products tab, and under the Products tab, you can see the Product menu.
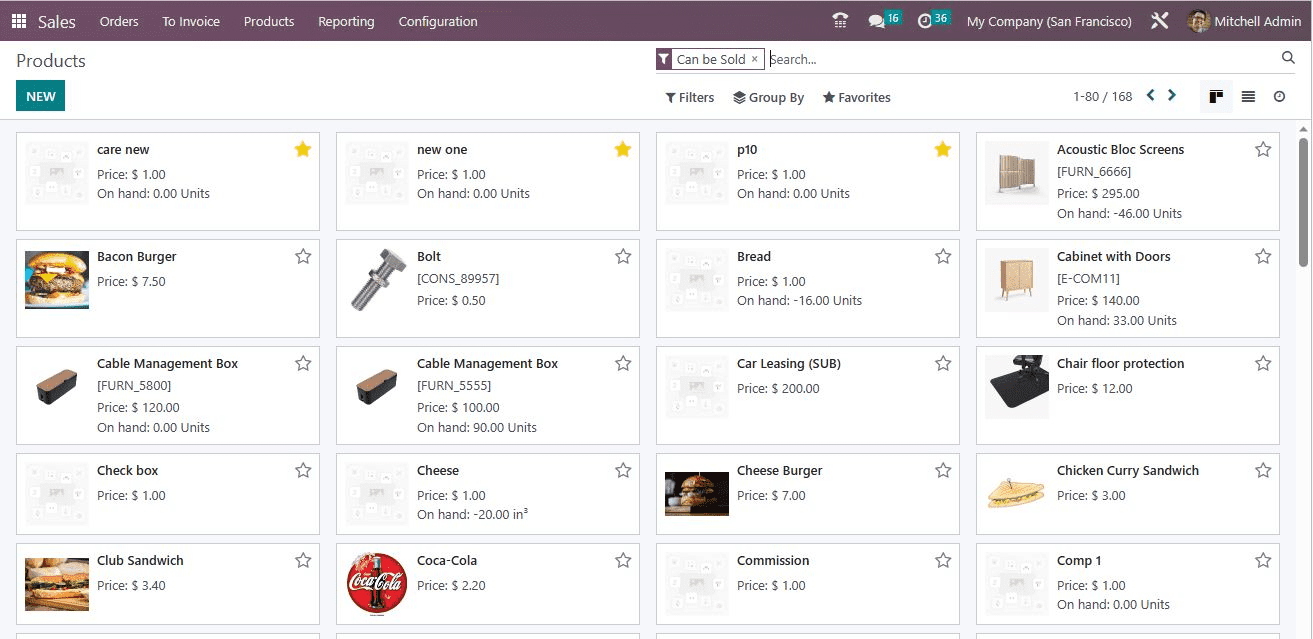
Select the NEW button to create a new product. The screenshot of the new creation form is depicted below.
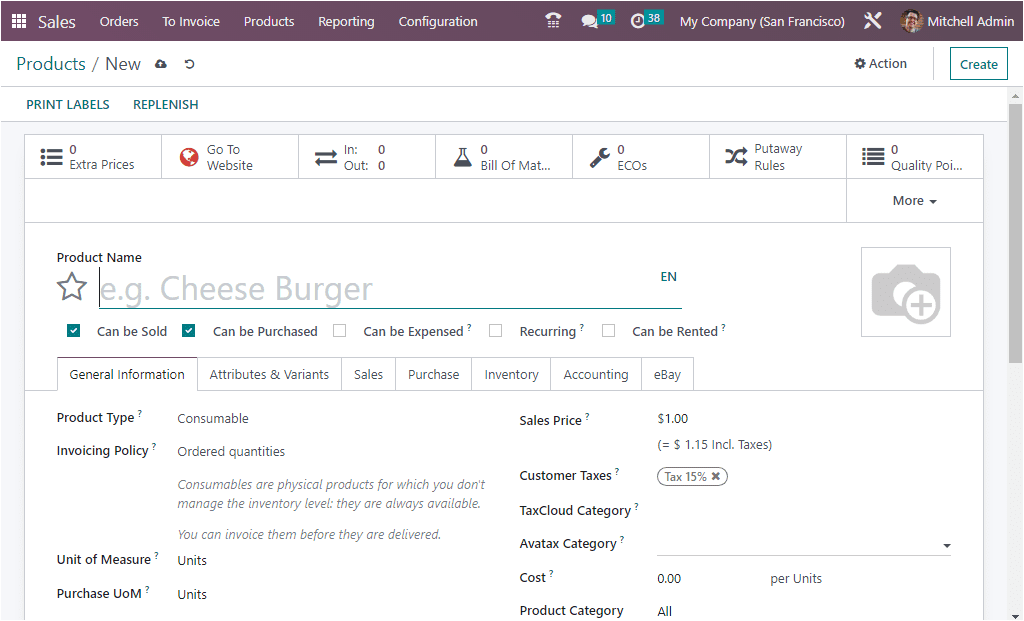

We can create a Shirt as a product. The Product Name can be mentioned as a Shirt. Then, we can activate the Can be Sold and Can be Purchased options. After that, we can provide general information about the product under the General Information tab. The Product Type can be set to Storable Product. The Invoicing Policy can be set to Ordered quantities. Then you can set the Unit of Measure and Purchase Unit of Measure. Later you can allocate the Sales Price, Customer Taxes, Tax cloud category, and other details in the provided area. In the Attributes & Variants tab, you can include the attributes and values for the product.
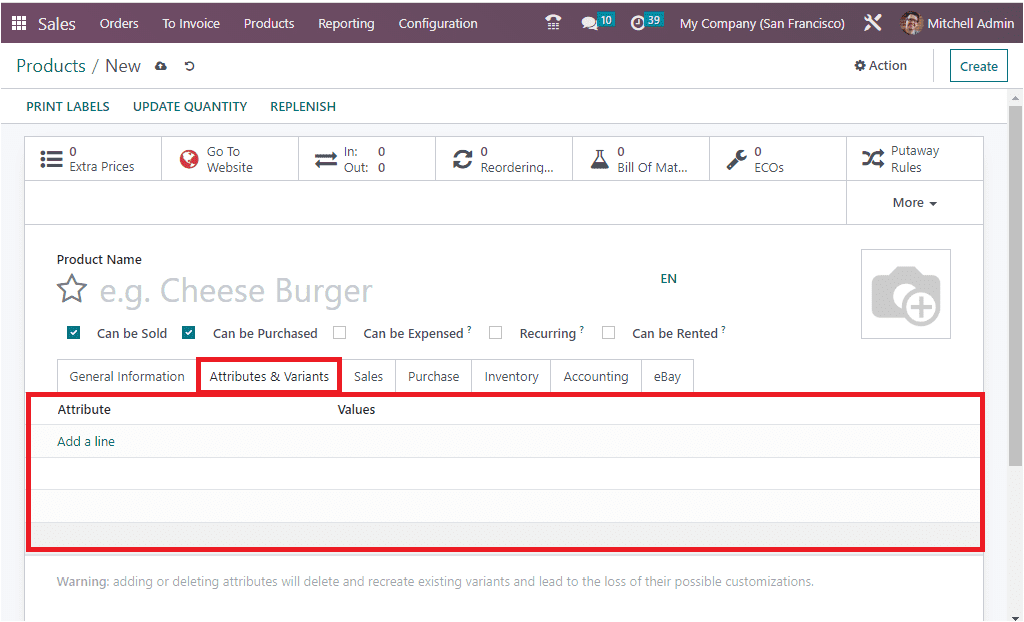
To add an Attribute, you click on the Add a line option. Here, in the dropdown menu, you can find all the existing attributes that we described in the platform earlier. It is also possible to create a new attribute from here itself. When we choose Attribute, you will be able to view the corresponding values under the Values tab. So, let us select Material as an Attribute. The corresponding values, such as Nylon, Cotton, and silk, will be displayed under the Values tab, as shown in the screenshot below.
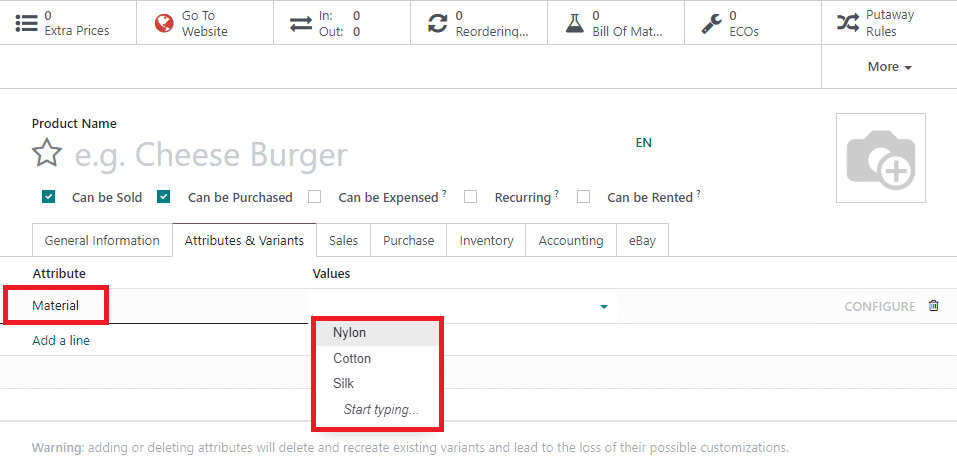
From the list, we can select the values under the Values tab. We can also select the Color as another attribute with White, Dark blue, Black, Green, Grey, Blue, Pink, and Yellow. In the right corner, you can see the CONFIGURE and Delete options on each attribute record, as shown in the image below.
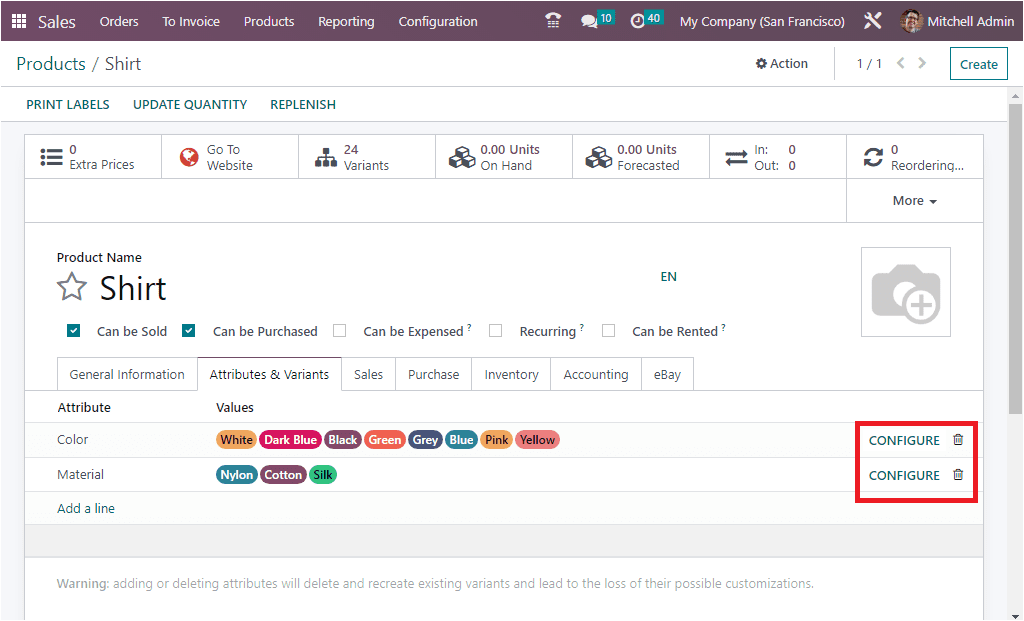
When you click on the CONFIGURE option to configure the attribute and the value. Let us click on the CONFIGURE button available on the Color attribute.
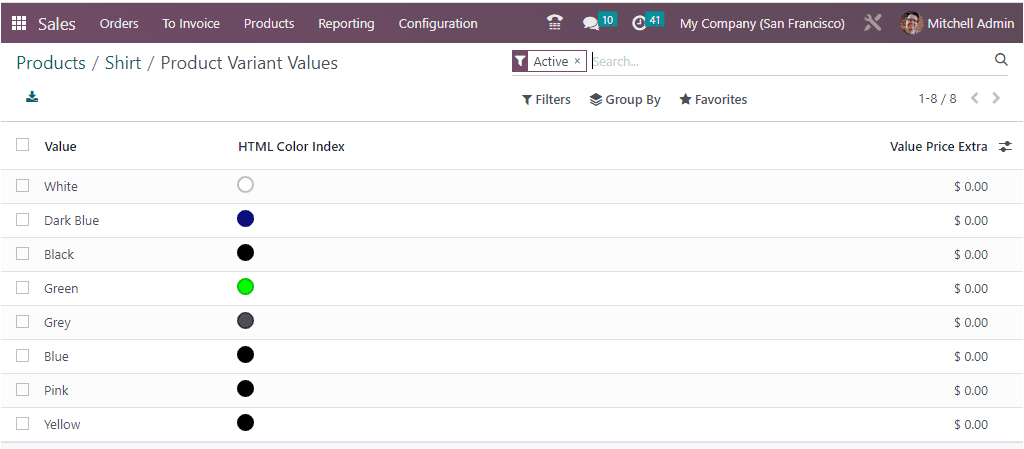
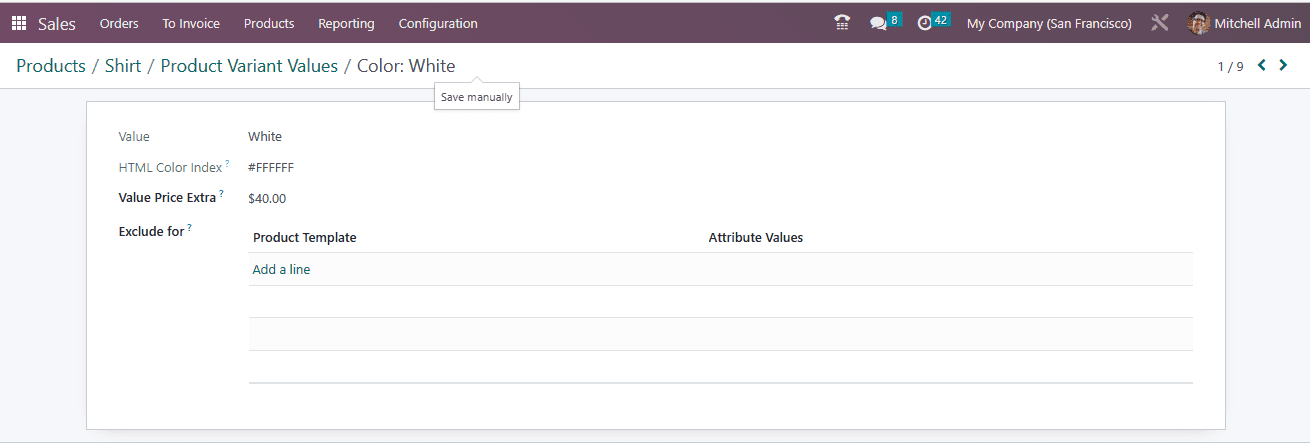
Here, you can view all the values available. You are also able to choose each value with a single click. Let us click on the White product variant value. Now, the system depicts another form, as shown below.
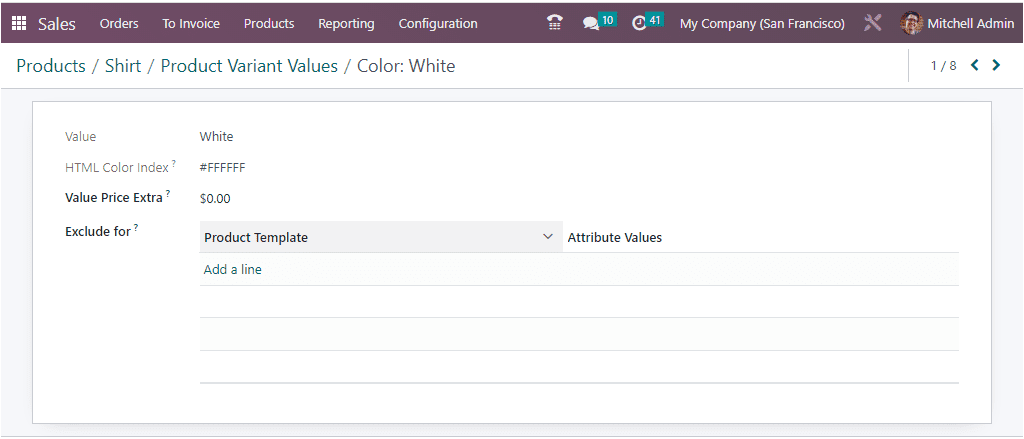
Here, you have various options for configuring the variant value, like the extra price for the variant with this attribute value on the sale price under the Value Price Extra field. For example, if you want to give different prices for different colors, you can do it using this option. Likewise, it is also possible to make this attribute value not compatible with the other values of the product or some attribute values of optional and accessory products. This can be done by clicking on the Add a Line button. The Product Template and the Attribute values can be added. So, this particular attribute value will not be available in this product template.
Here, we can set 40 dollars for the color white, as shown in the image below.
Now back to the ‘Attributes & Variants’ tab, under which we can view the ‘SALES VARIANT SELECTION’ field with two options such as ‘Product Configurator’ and ‘Order Grid Entry.’ We can choose the required one.
Now we can choose this product in the sale order. For that, go to the Orders tab and select the Quotation menu. Using this menu, create a quotation.
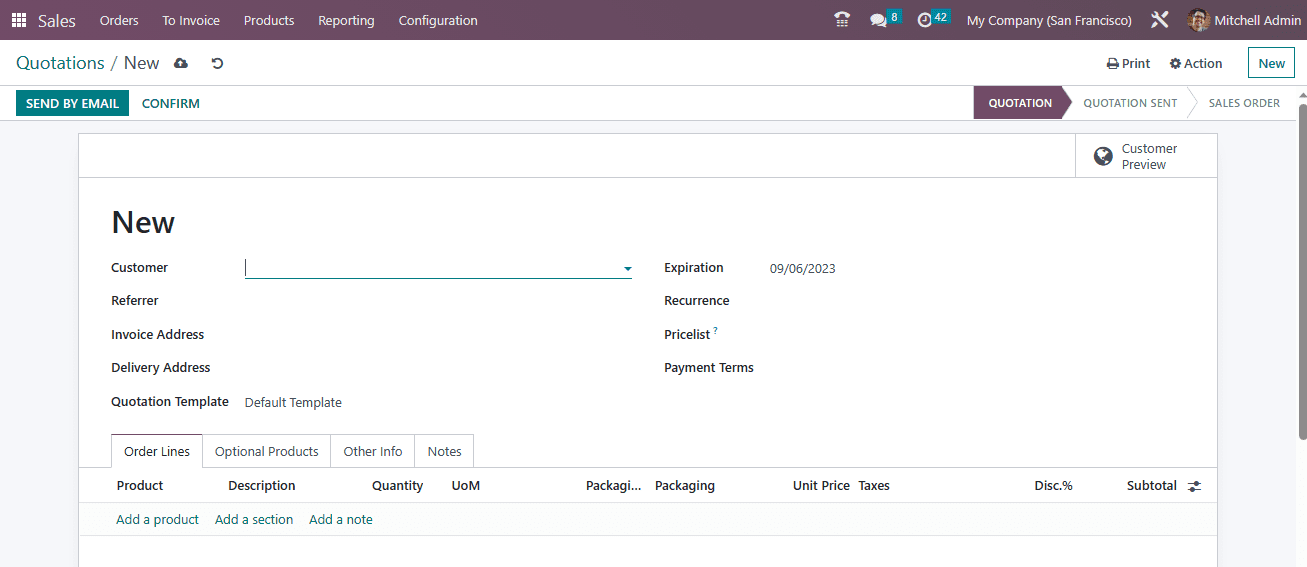
Here you can choose the customer ‘ Anita Oliver’, and fill out all the required information. Now, under the Order Lines tab, choose the product Shirt. Next, you will receive a popup window with the product configurator, as shown in the screenshot below.
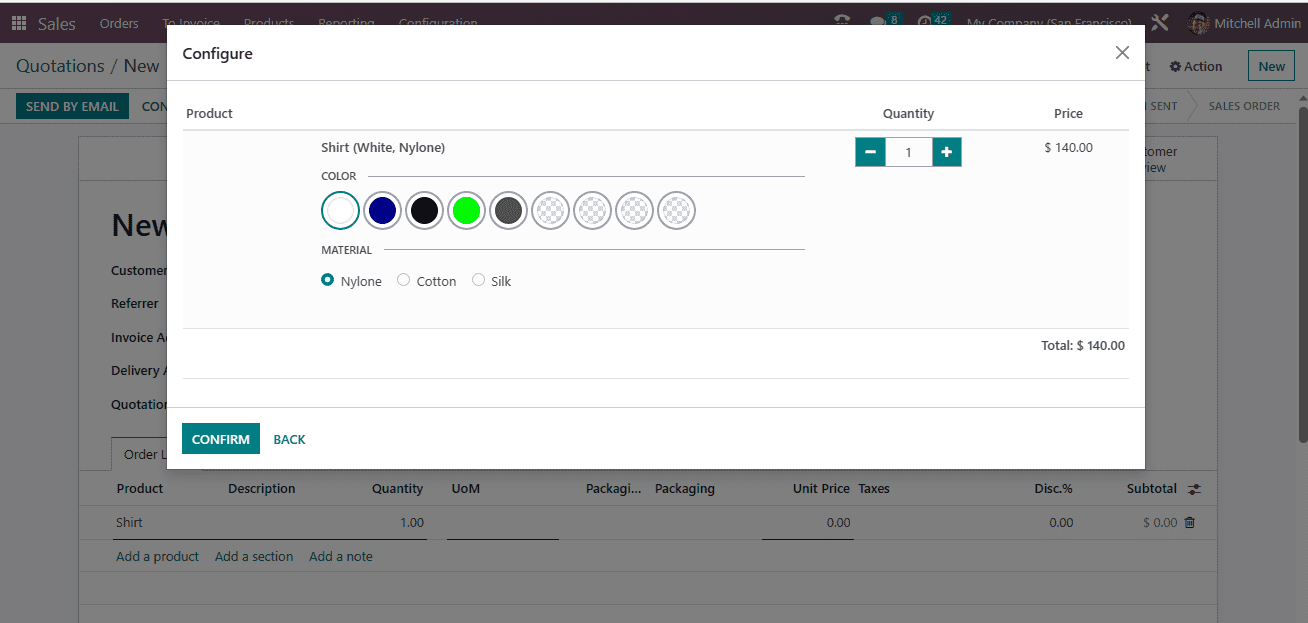
From this window, you can choose the Color, material, Quantity, and other details. All the attributes and variants that you configured for this product will be displayed here in the window. The Price that we set for this attribute will be automatically displayed in the window. Here, the Shirt in White color cost 140 dollars. The Shirt’s Sales price is $100, and the color costs $40. Now let us click on the CONFIRM button. Now the Order Lines details will be displayed under the Order Line tab.
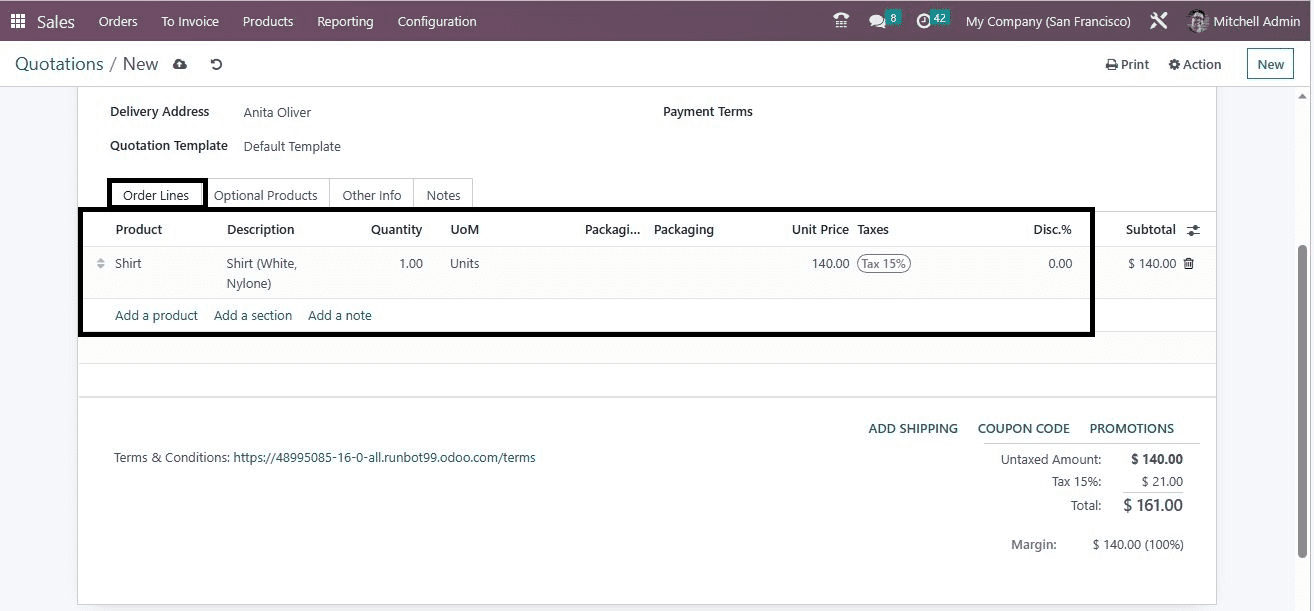
After verifying the details, click on the CONFIRM button. This way, you can configure product variants in Odoo 16 Sales.


